Install your eSIM on iPhone (iOS 26) via the Simify AppUpdated 5 months ago
Watch the video tutorial: Click here 👉 Simify Tutorial: How To Install An eSIM On iPhone iOS 26
Or follow the step-by-step guide below 📲 How to Install Your eSIM on iPhone (iOS 26)
Option 1 – Automatic Installation (iOS 26)
(Recommended if your iPhone is already updated to iOS 26)
👉 Follow these steps directly from the Simify app:
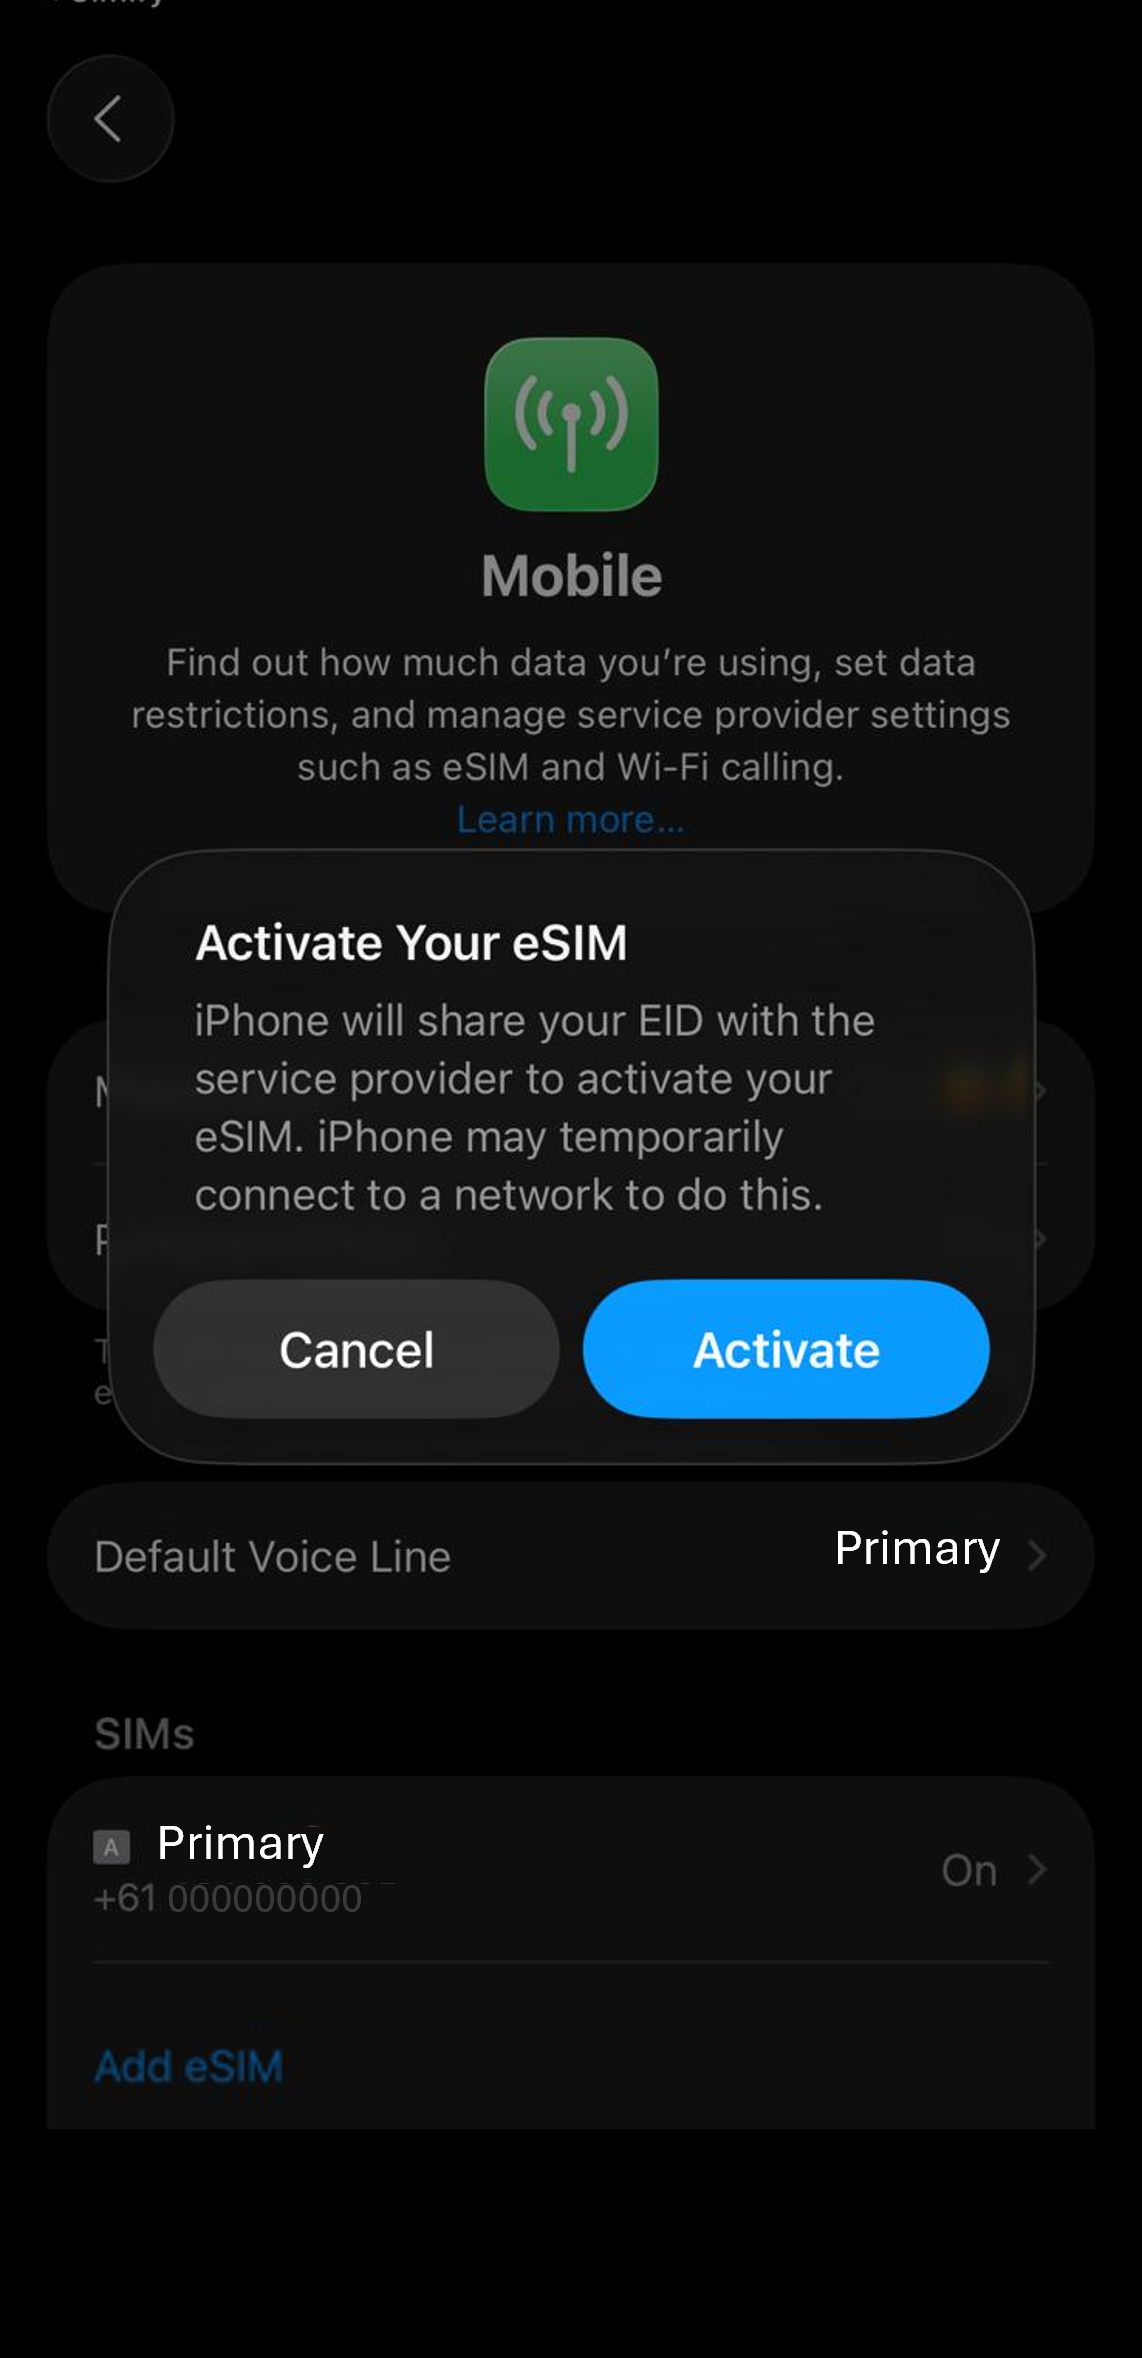
Open the Simify app and go to My eSIMs.

Select your eSIM and tap How to Install your eSIM.
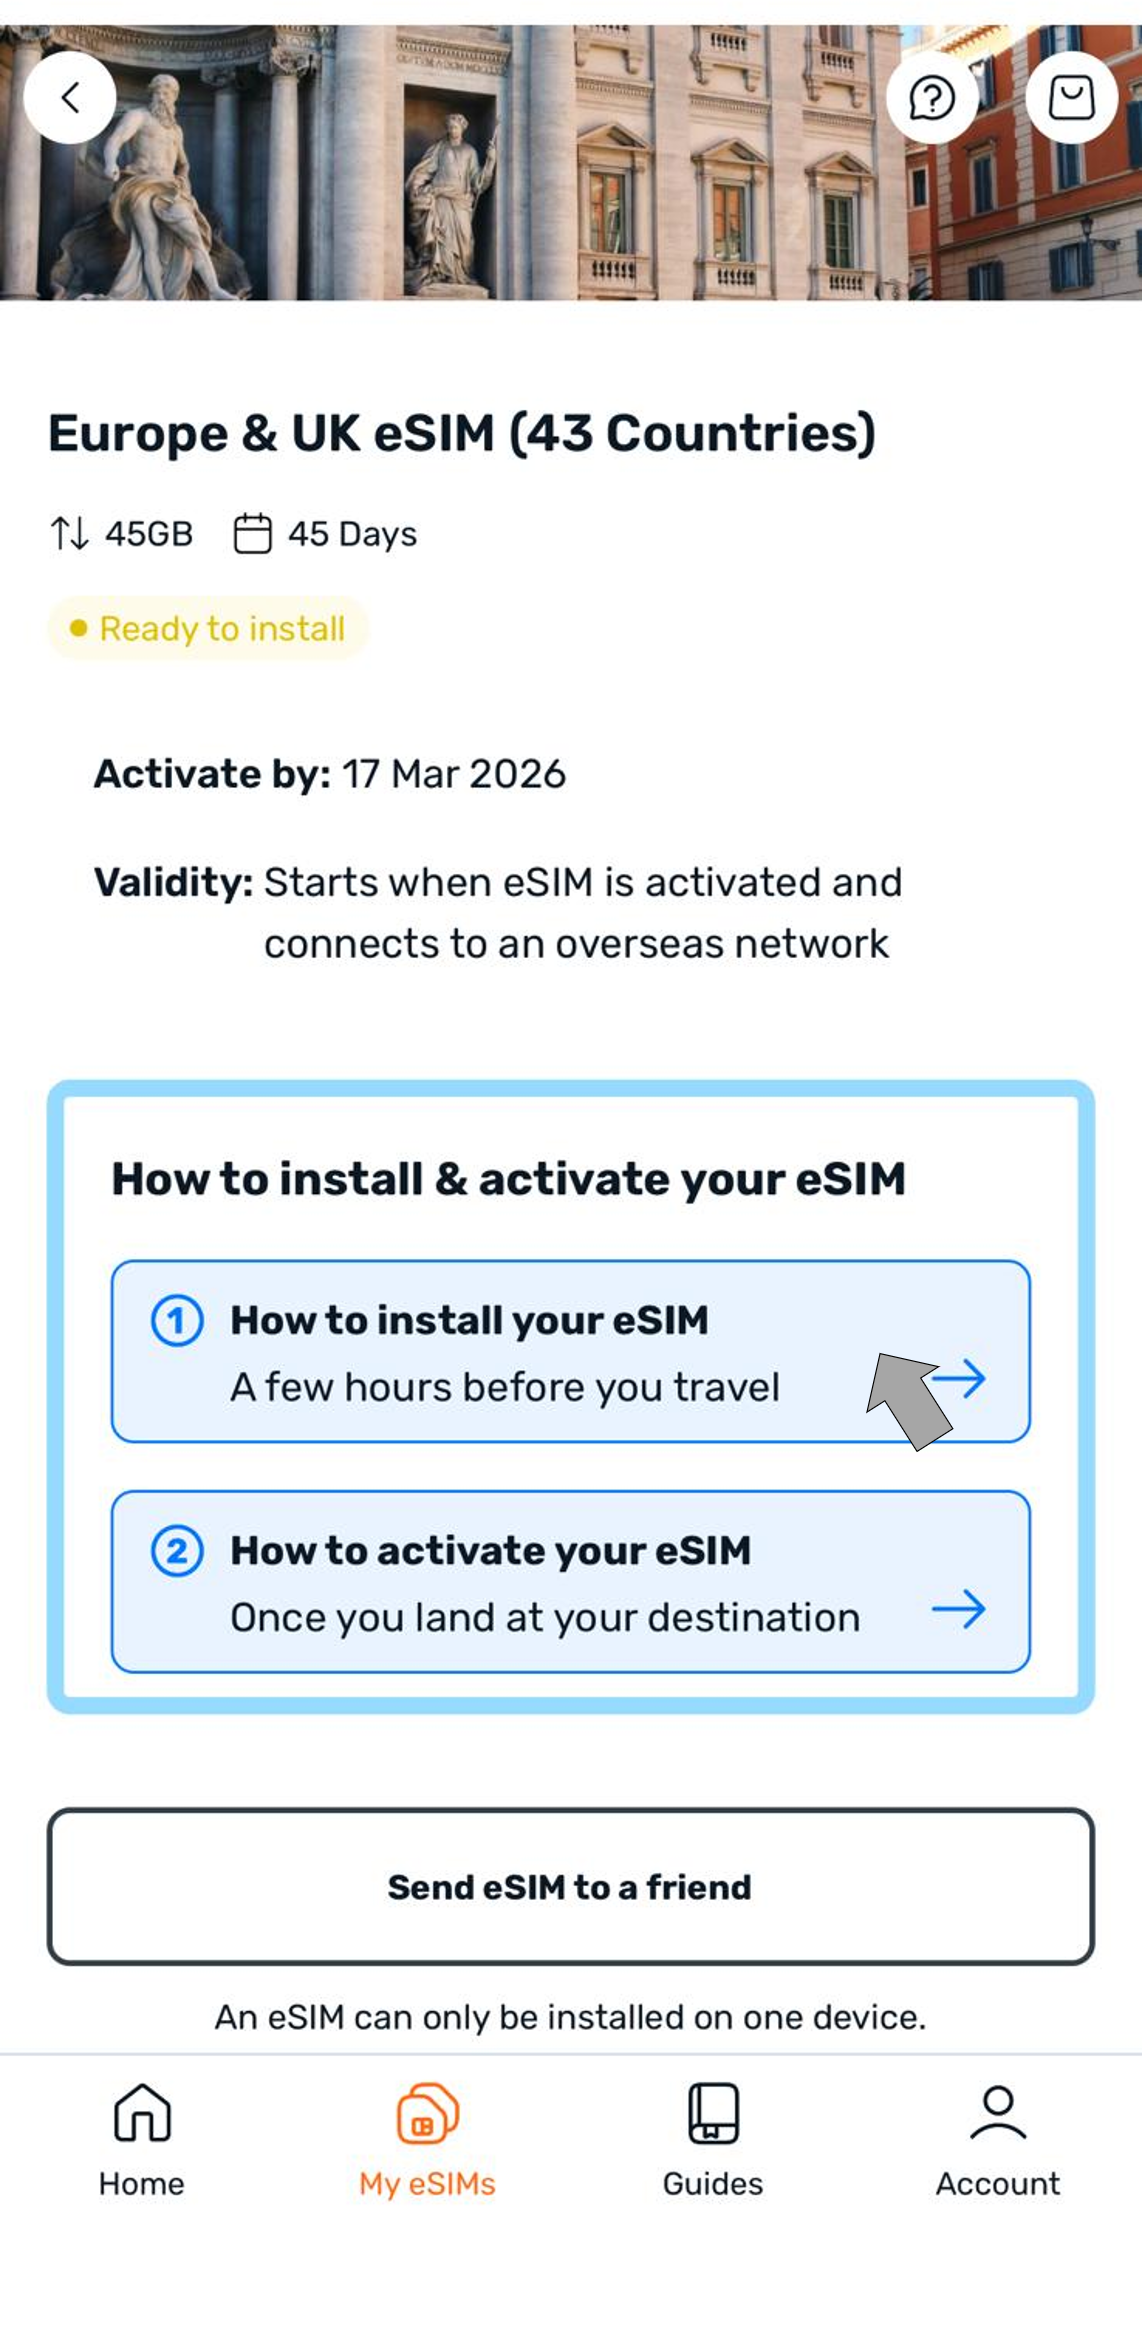
Choose Automatic.
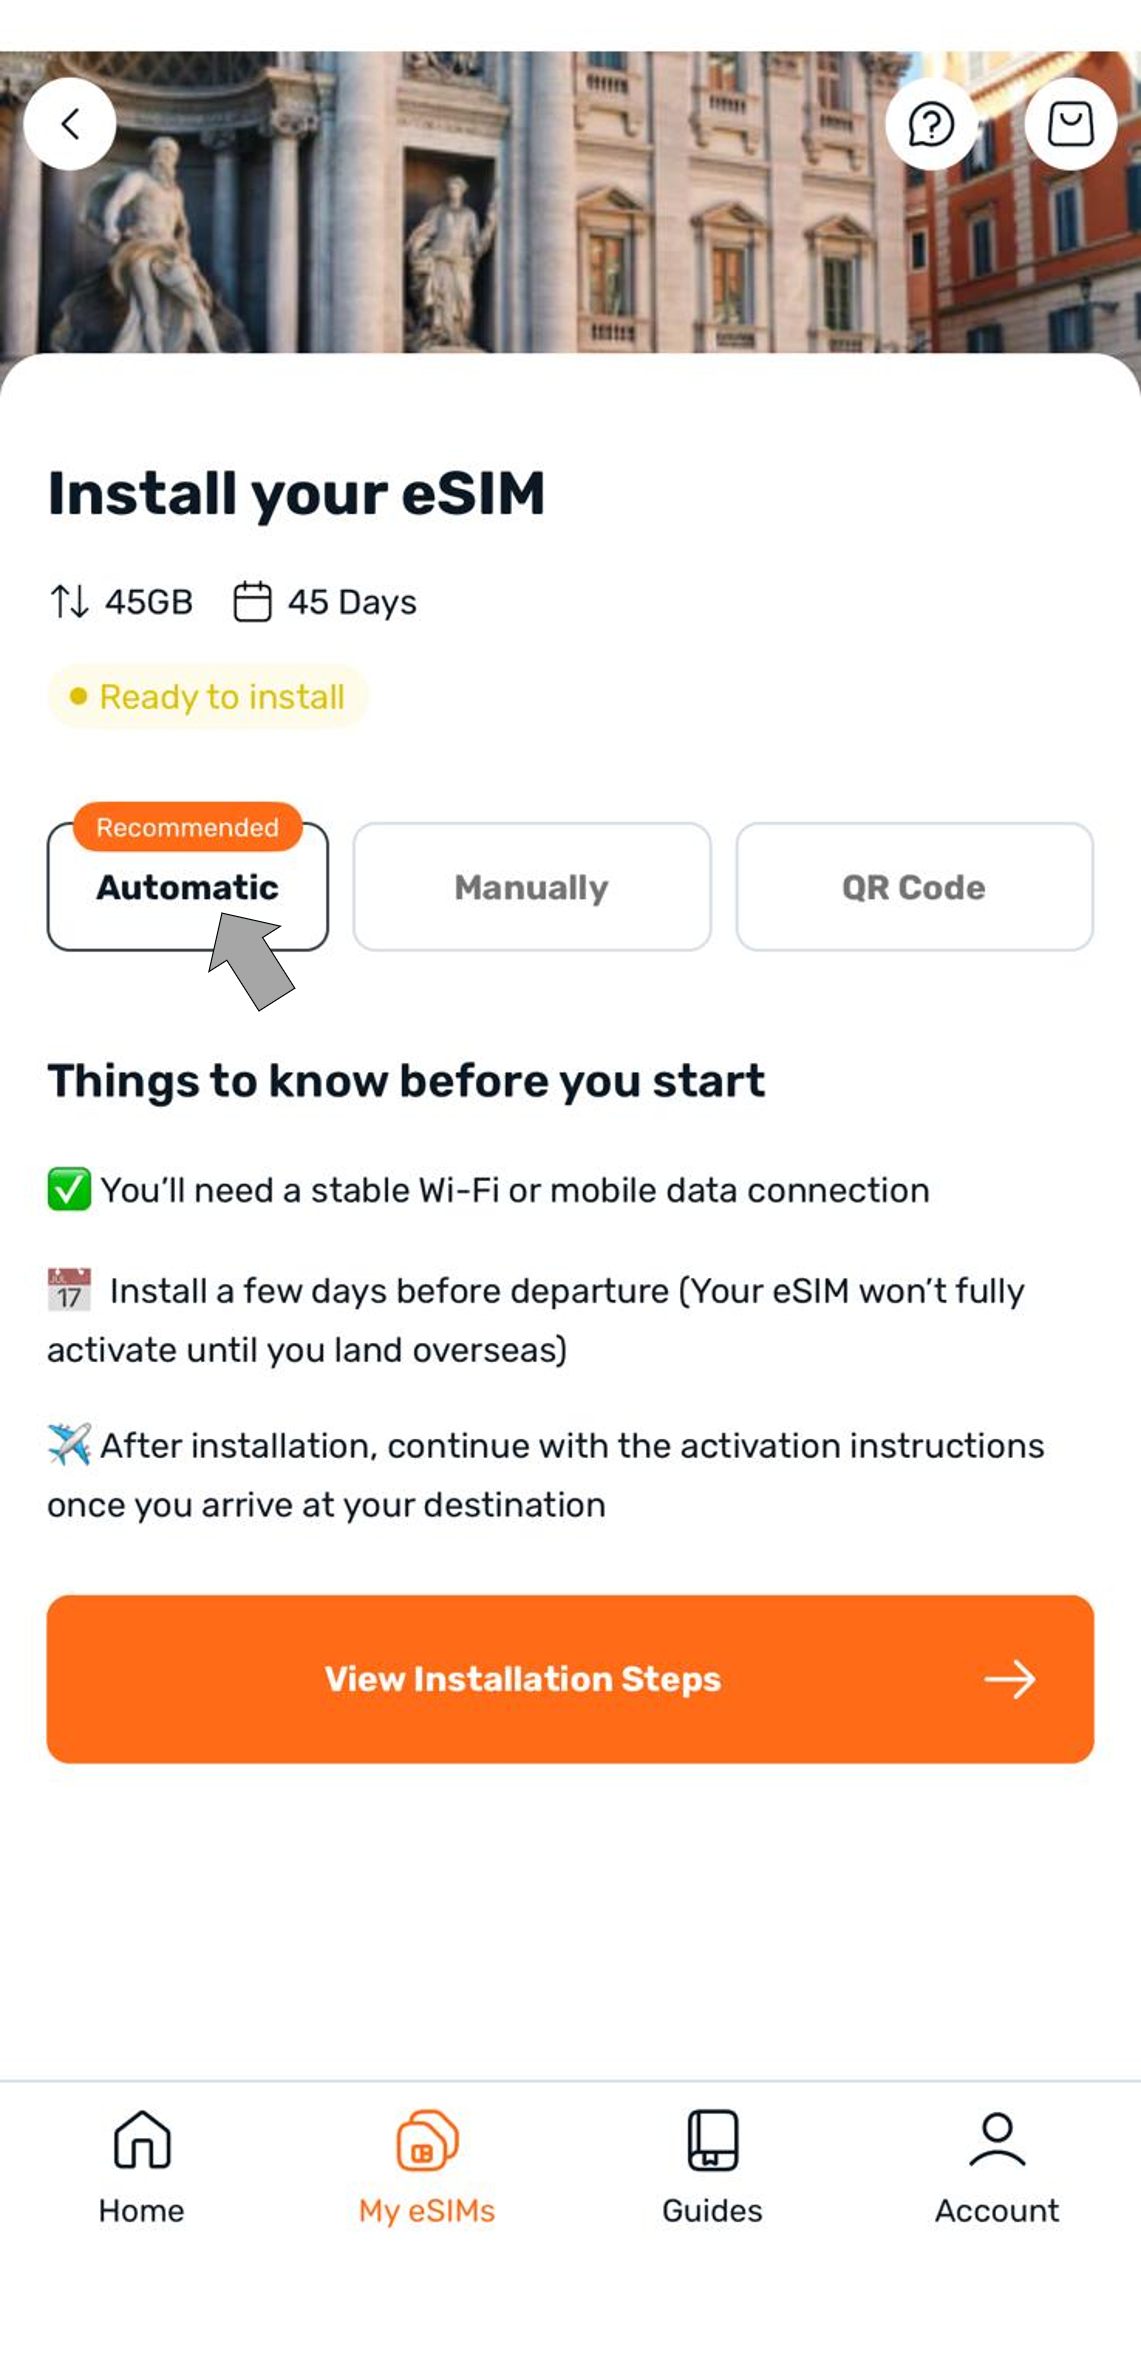
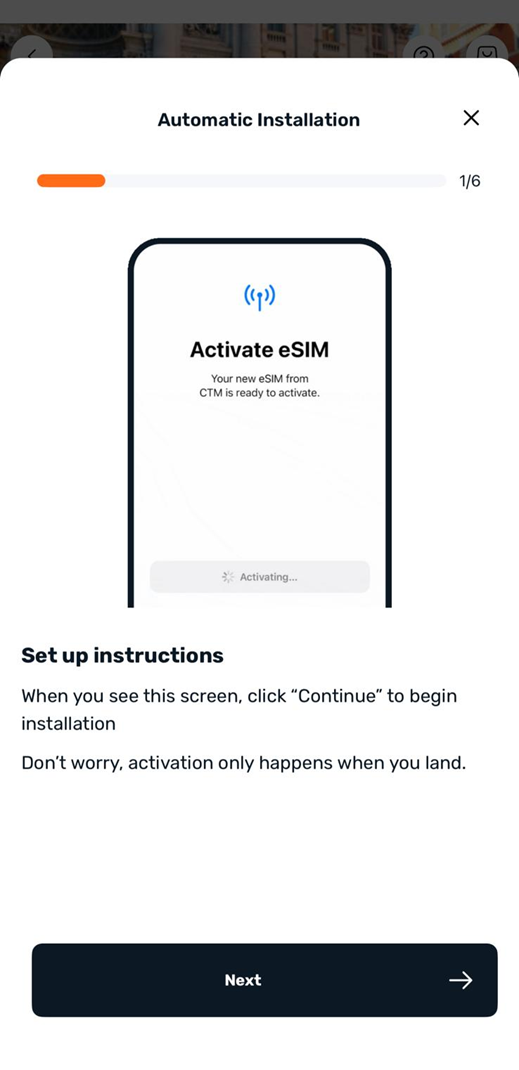
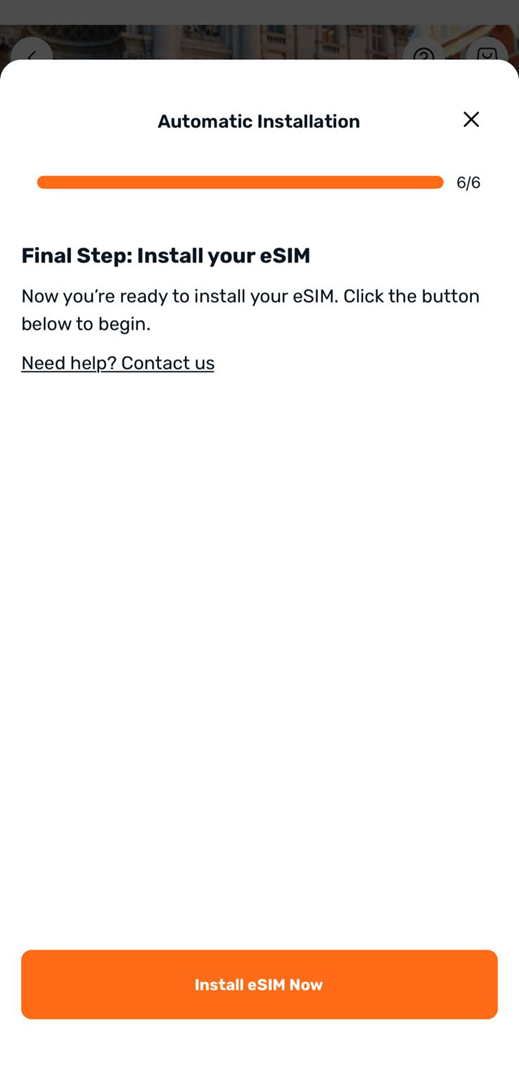
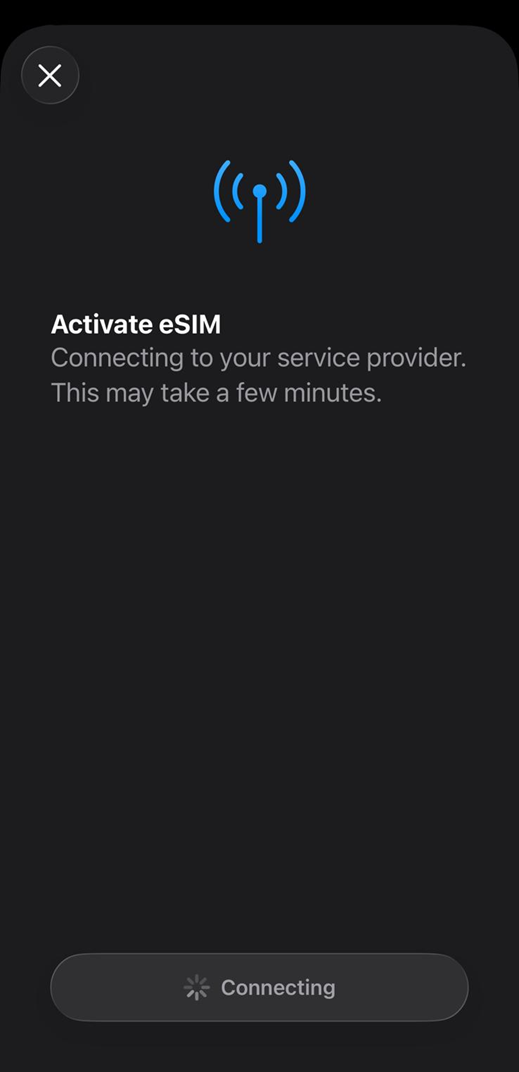
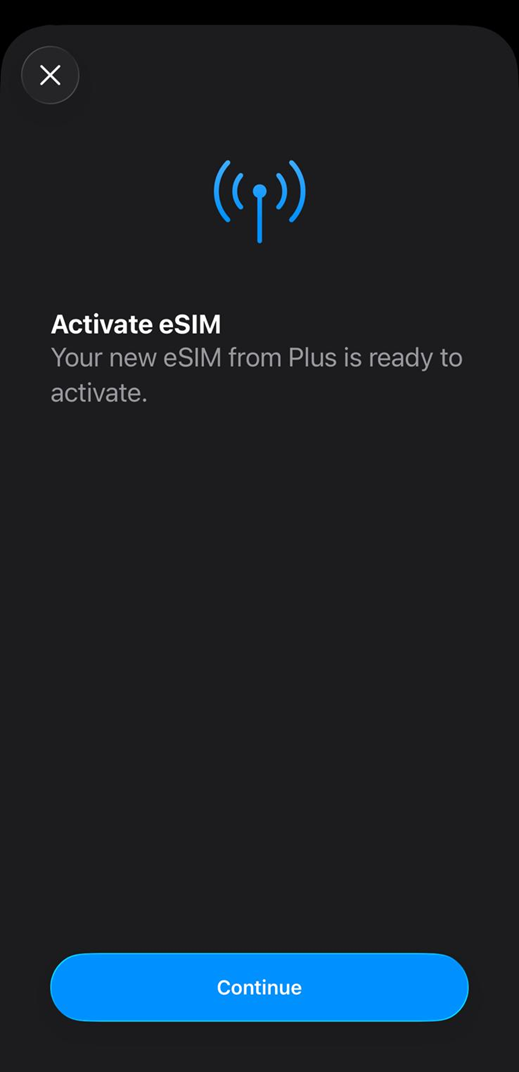
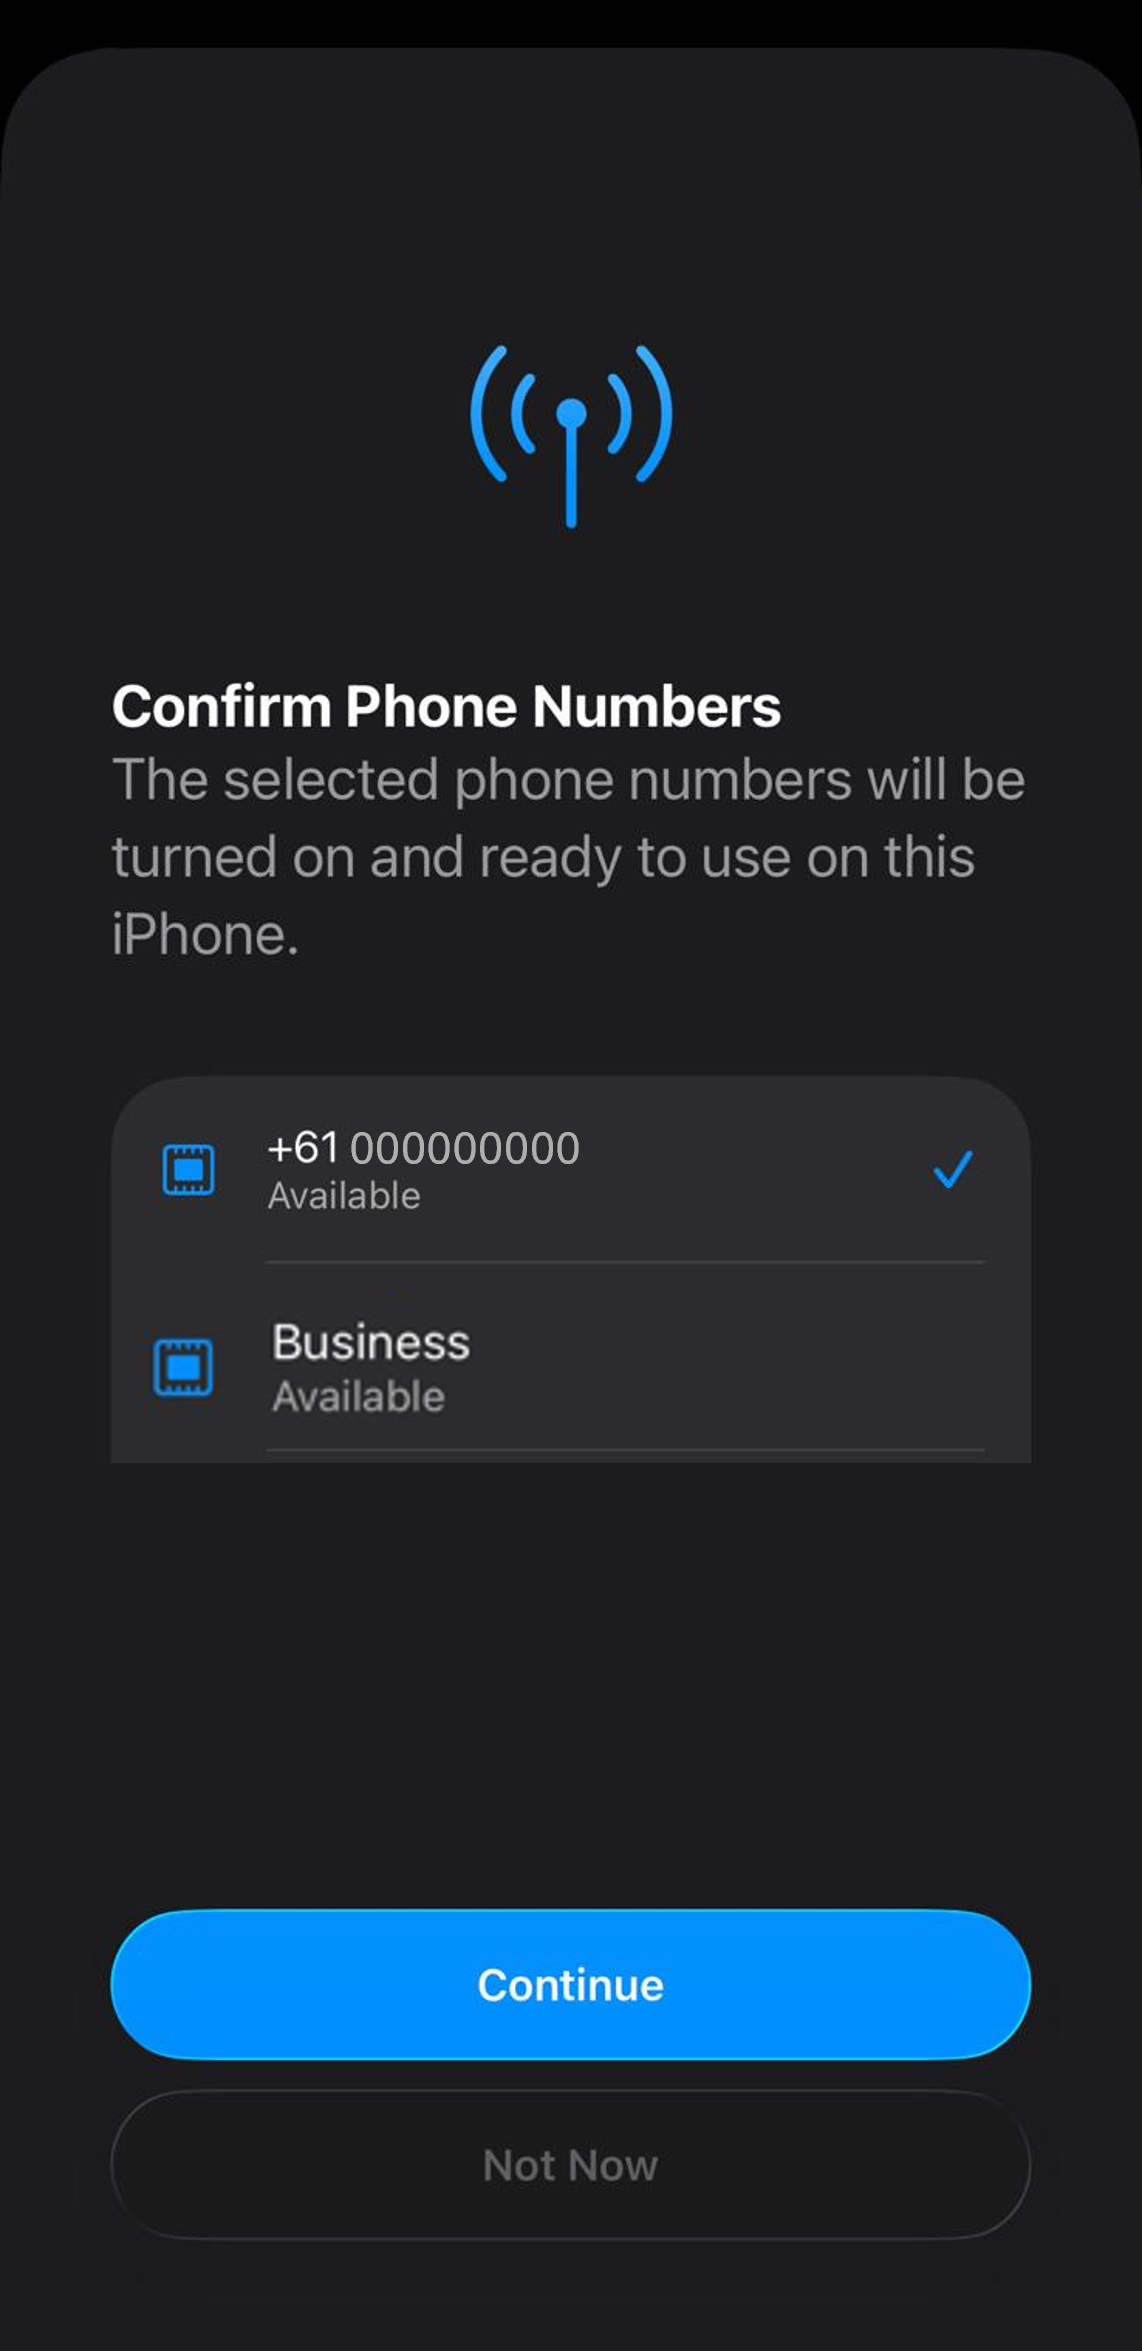
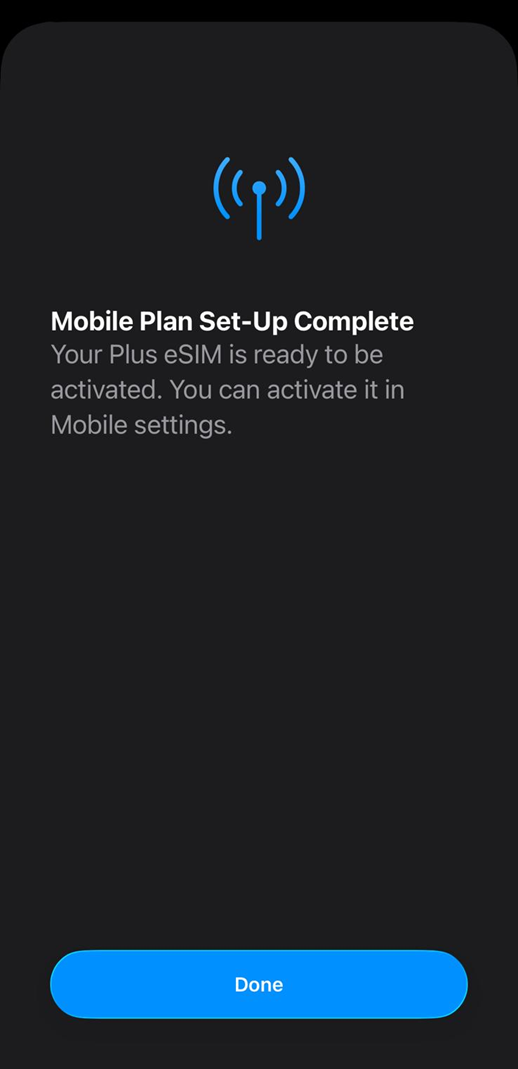
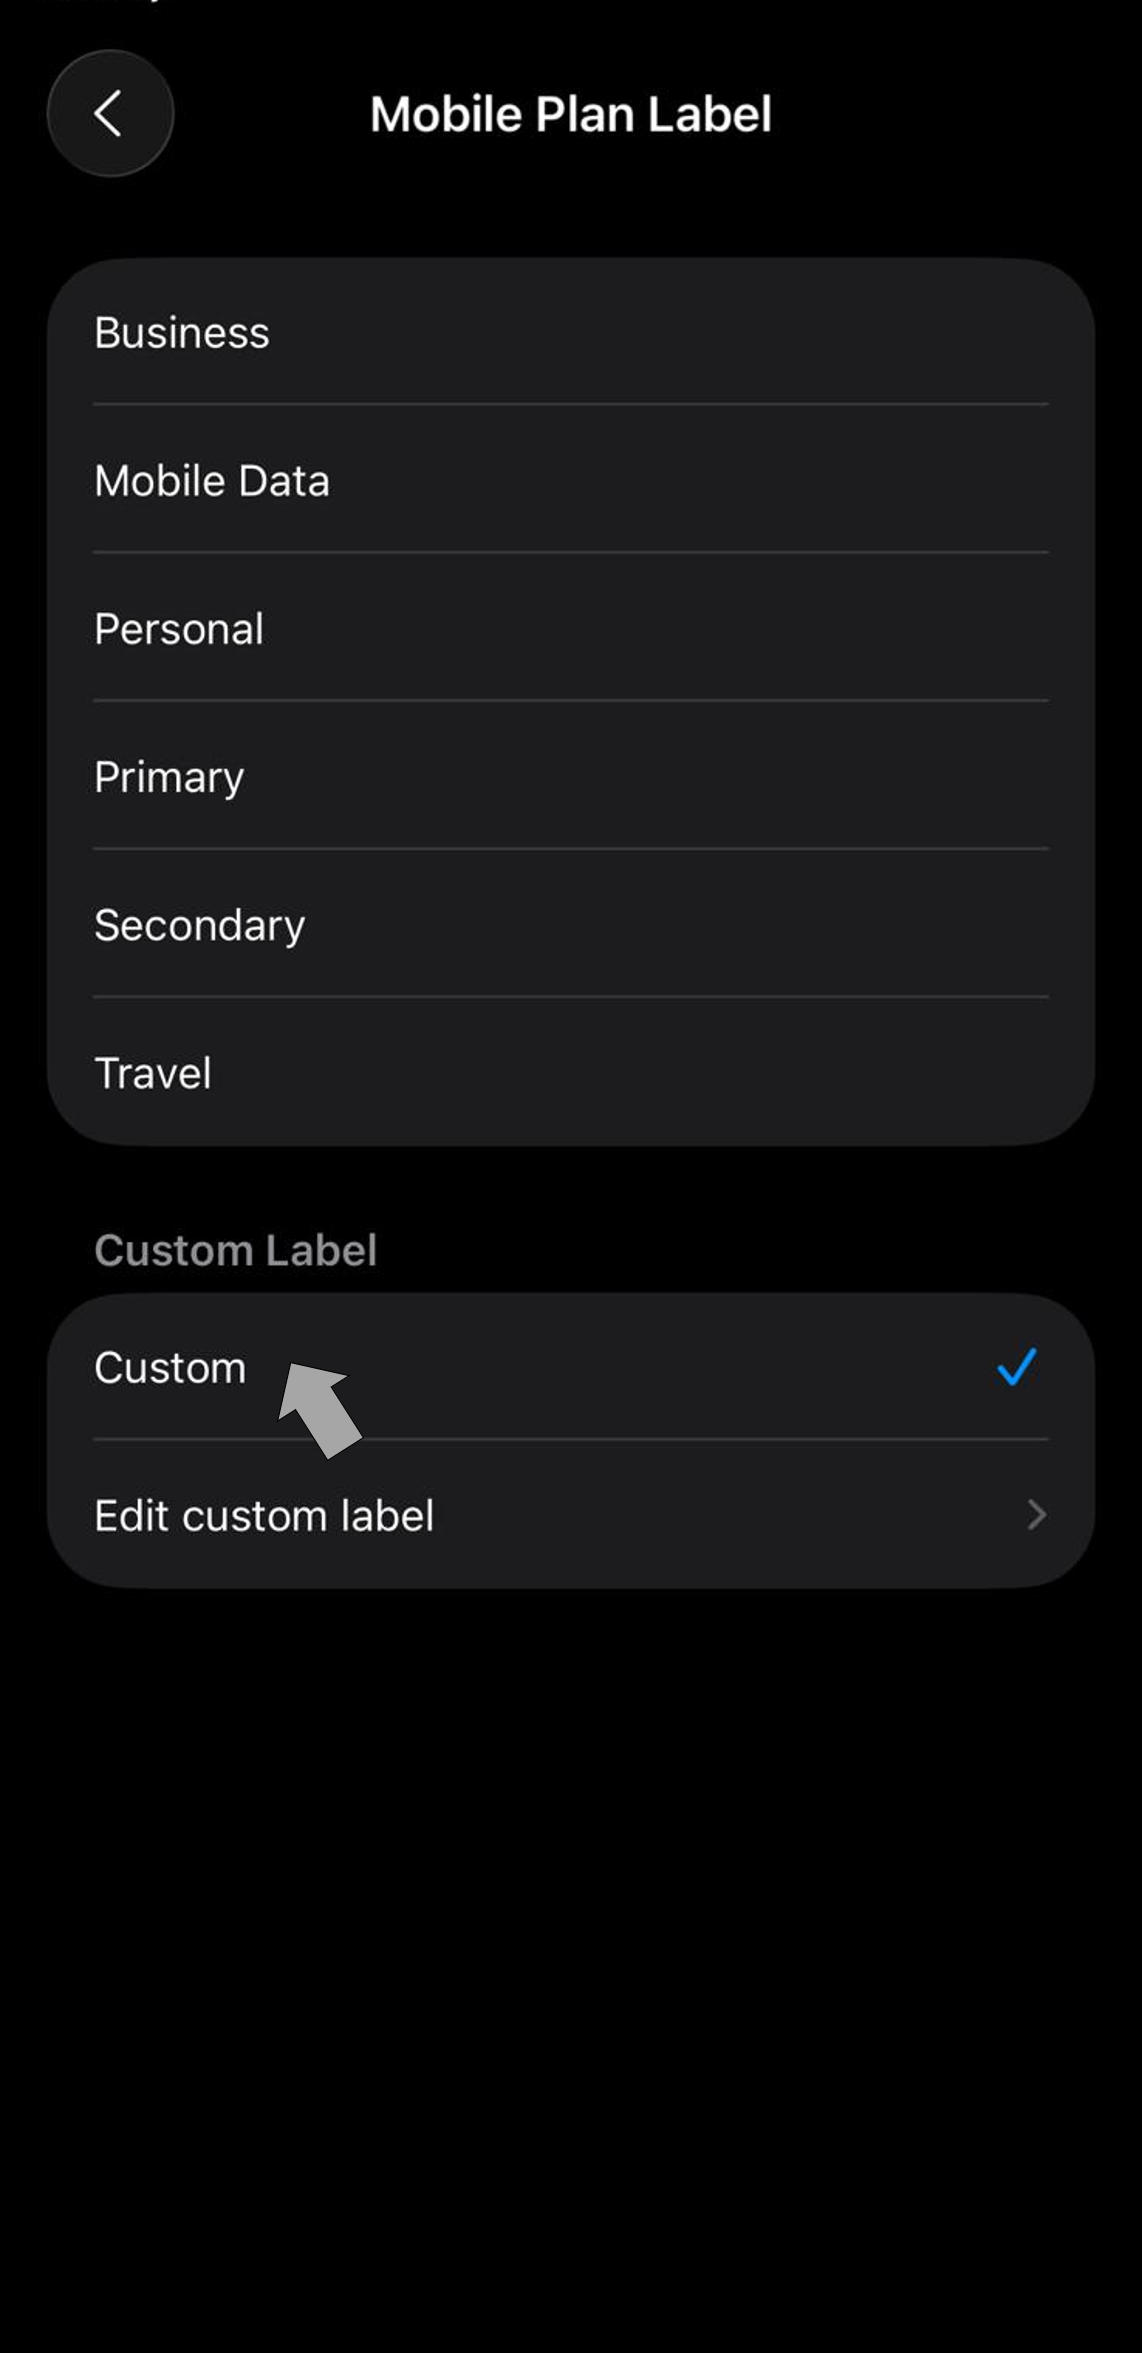
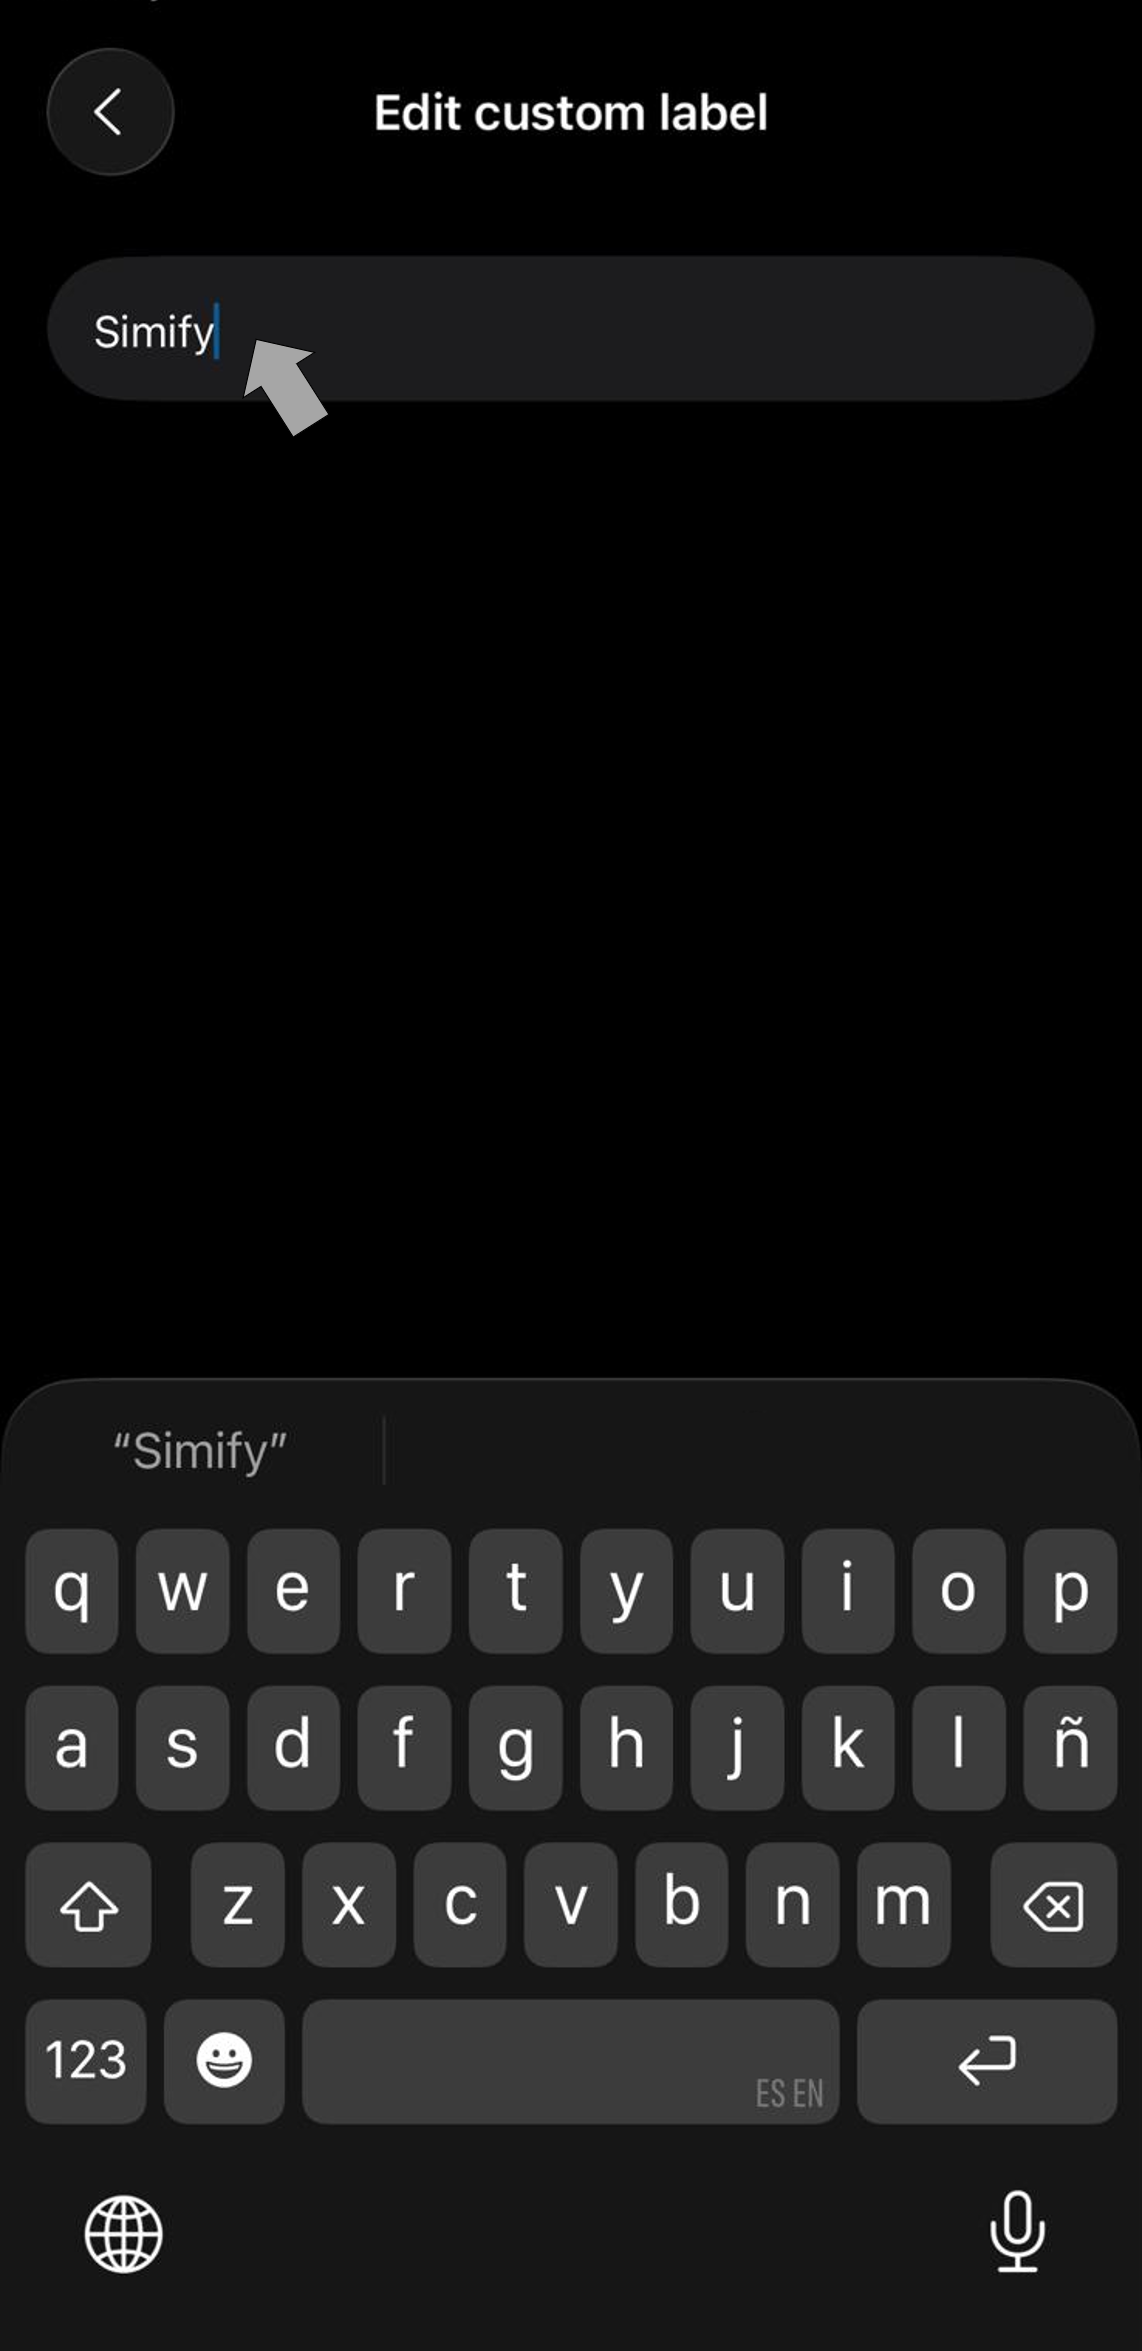
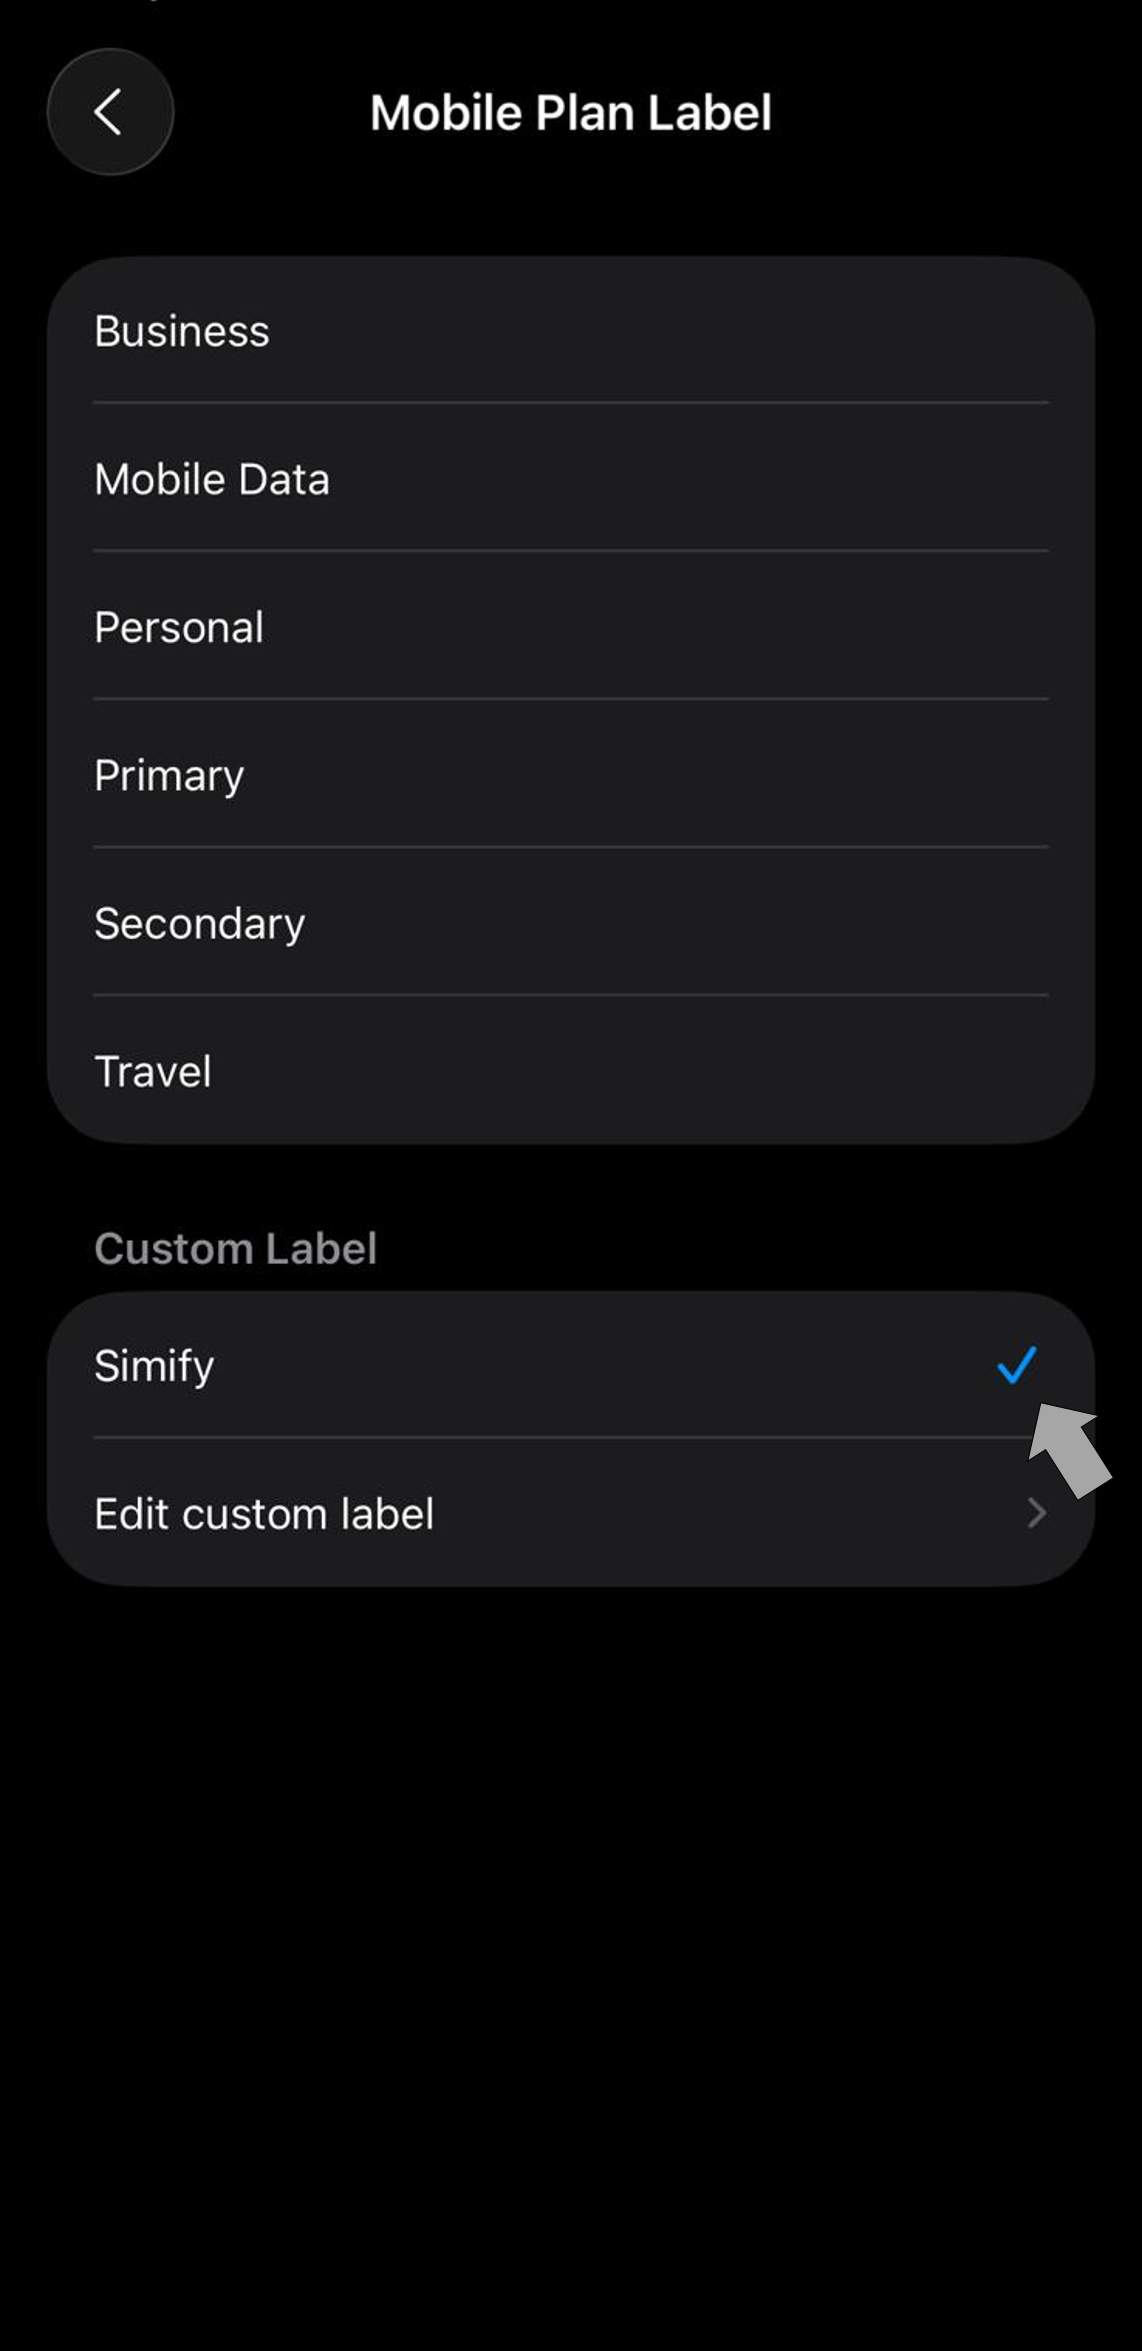
Tap View Installation Steps and follow the screens (Continue → Activate → Confirm numbers → Rename your plan as “Simify”).
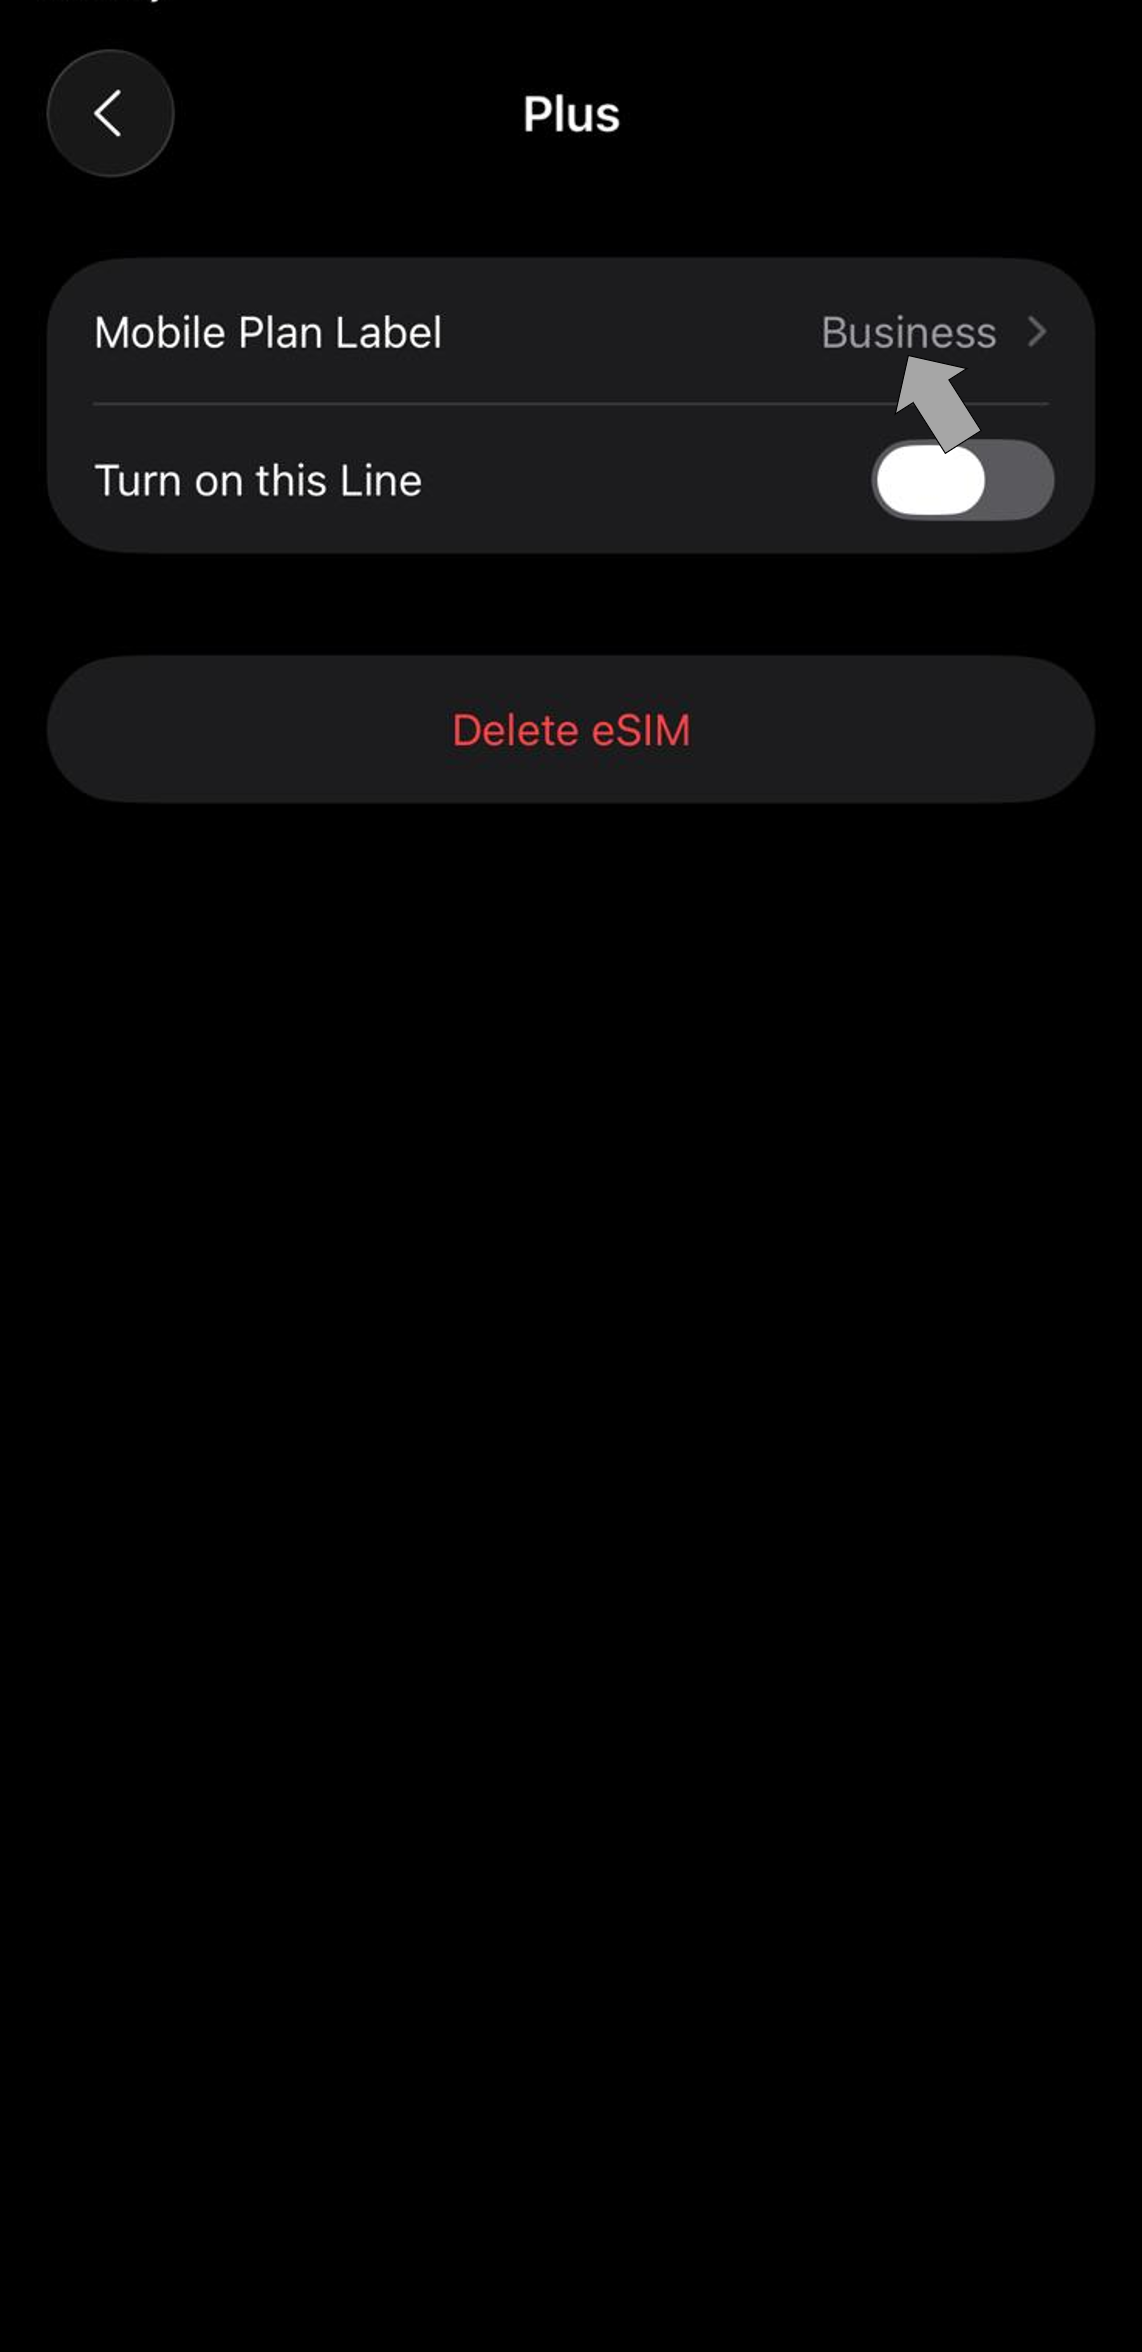
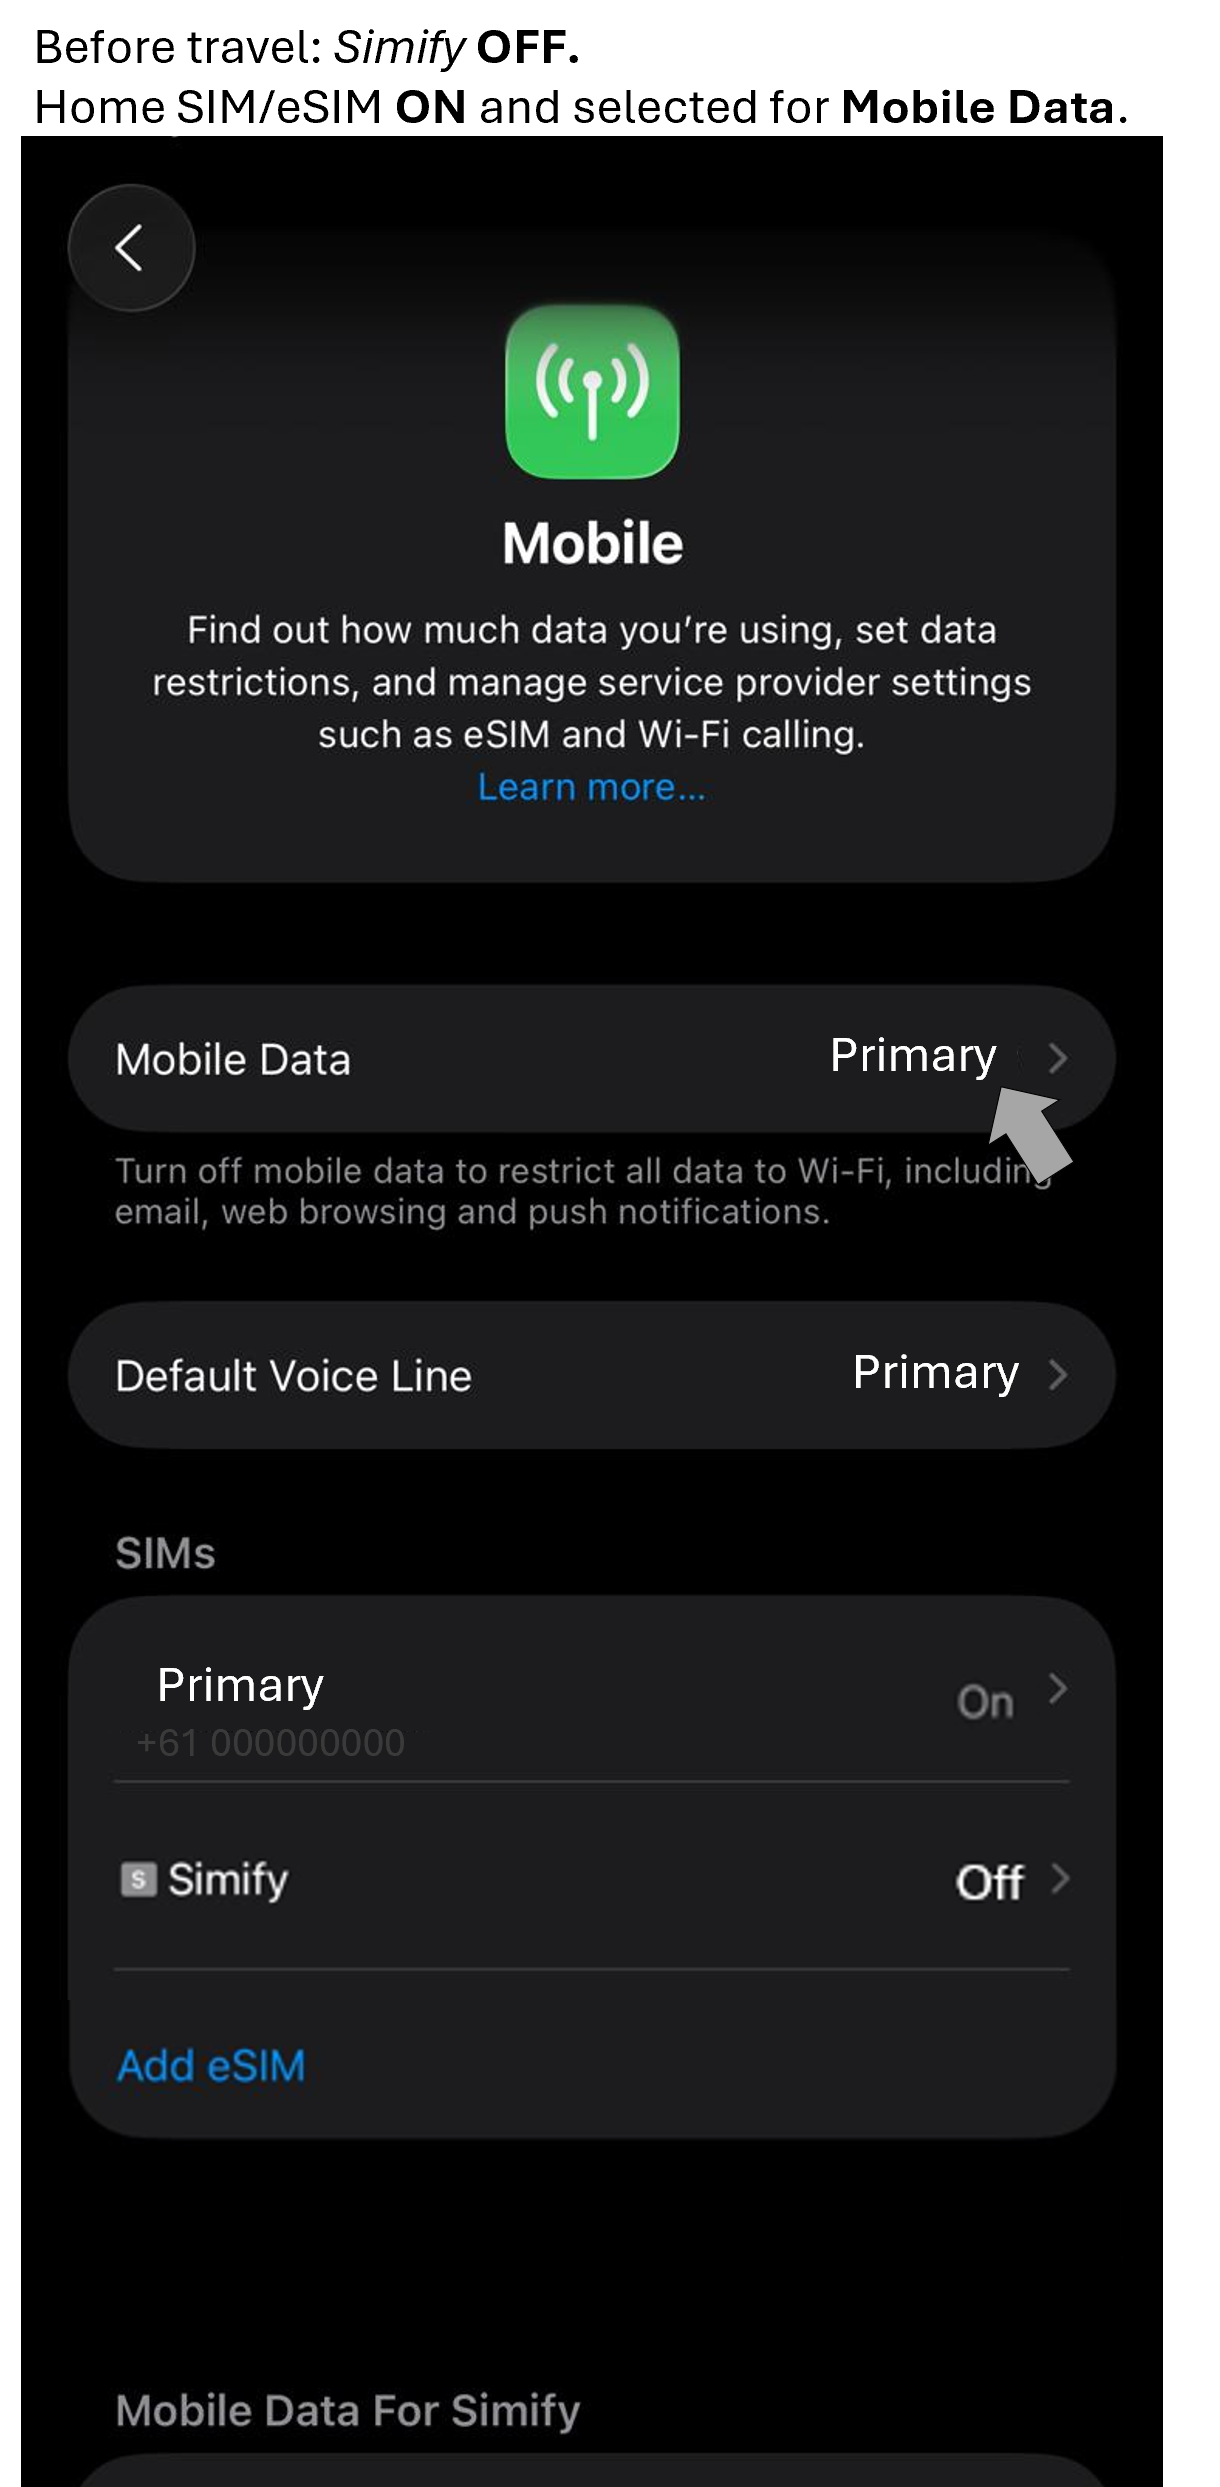
While you are still at home, make sure your ‘Simify’ line is turned OFF and Data Roaming is also OFF.
Done ✅ Your eSIM will be ready to connect once you land at your destination.
⚠️ If you install your eSIM before traveling, it may briefly show “Activating” and then give an error message. Don’t worry -this is expected. Simply switch it off and wait until you arrive at your destination.
Option 2 – Manual Installation
(via Settings → Mobile Data → Add eSIM → Enter Details Manually)
Option 3 – QR Code Installation
(via Settings → Mobile Data → Add eSIM → Use QR Code)
Check eSIM connection 📲How to Activate Your eSIM on iPhone (iOS 26) When You Land:
After Installing Your eSIM
You can keep your eSIM switched OFF until you travel - Activation only takes place once your eSIM connects to a local network in one of the covered countries.
Once you land in one of the covered countries:
Go to Settings > Mobile Data > [Your Simify eSIM].
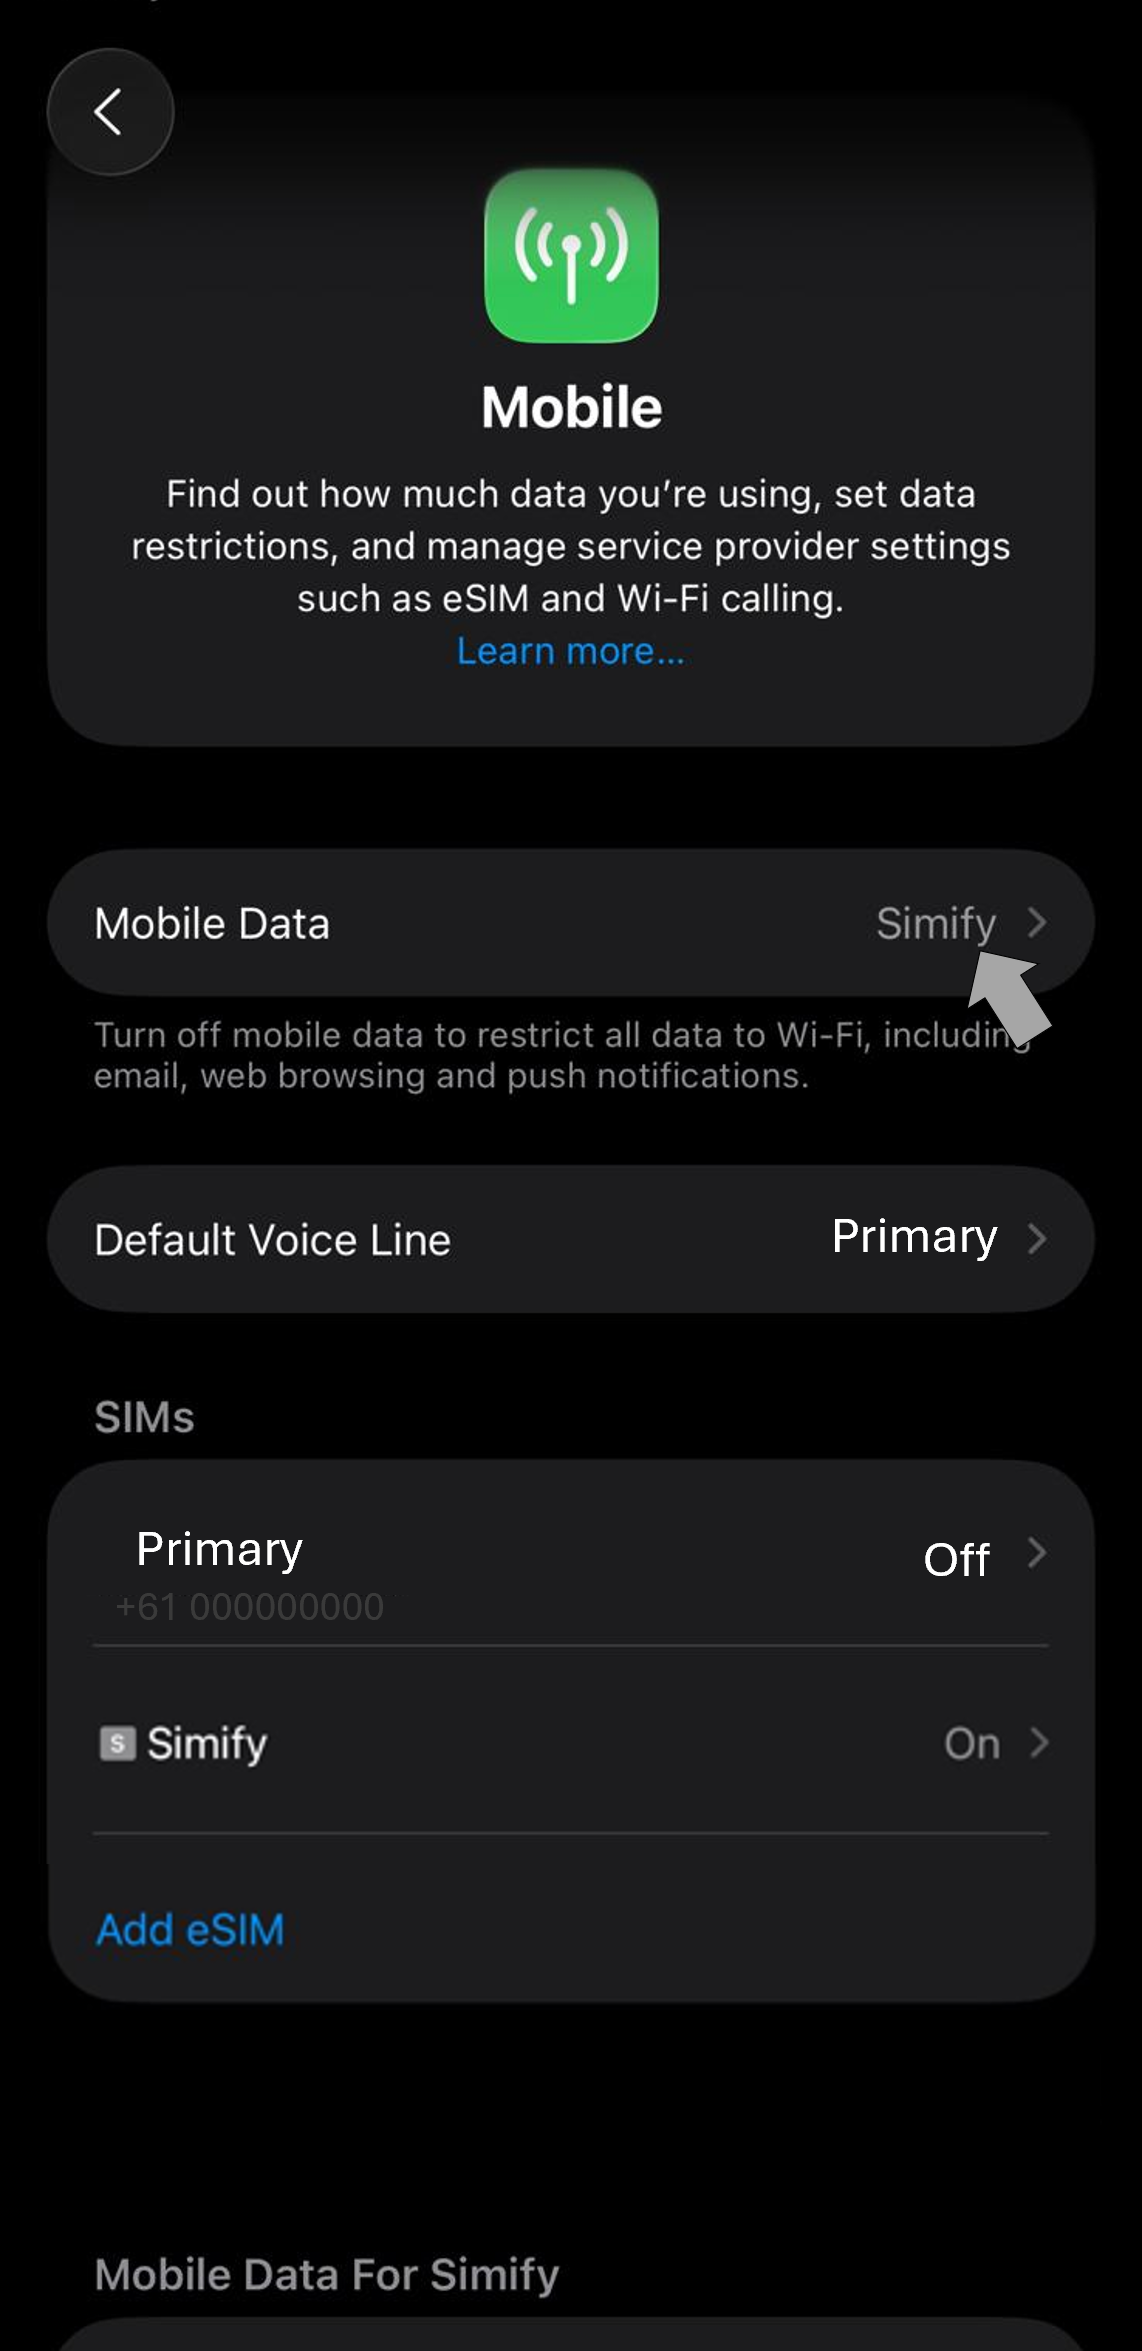
Open 'Simify' Toggle Turn On This Line → ON.
Scroll down and toggle Data Roaming → ON.:

Your eSIM will now connect to the local network automatically 🌍✅