Manually Installing an eSIM on AndroidUpdated 4 days ago
If you don't have another device you can scan your QR Code from, no worries! You can also manually install the eSIM using the code that was given along with the QR code. This method bypasses the QR code scan and allows you to install the eSIM using the provided information. Here's how that works.
What You’ll Need:
- An unlocked Android device that is eSIM compatible
- Your eSIM's Android activation code or LPA String
- A stable internet connection
Steps for Manual eSIM Installation:
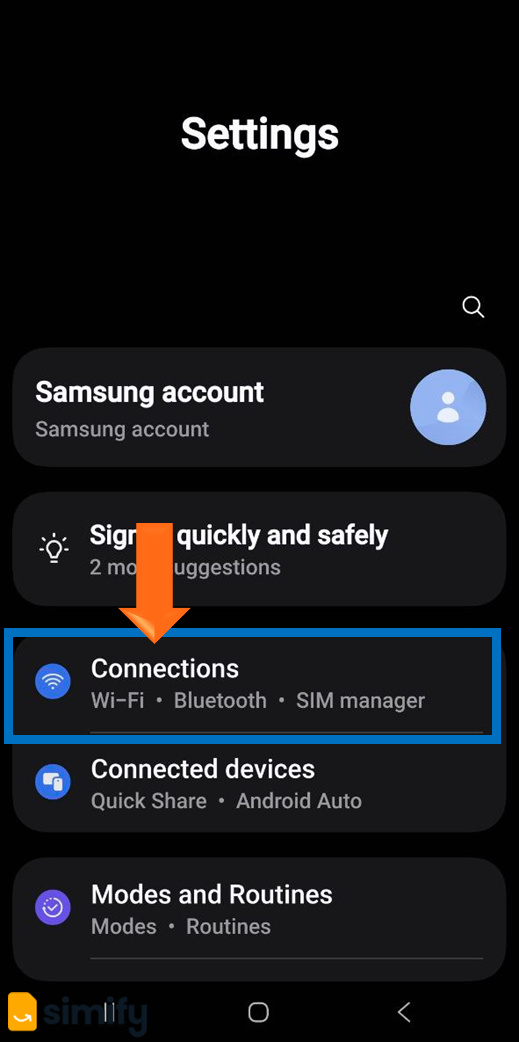
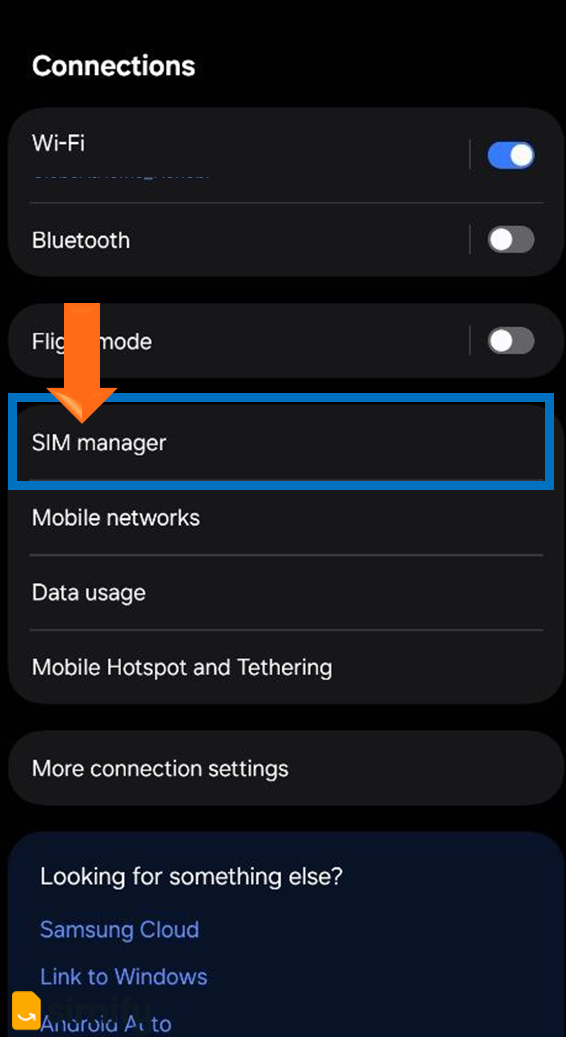
1. Locate the eSIM Installation Settings in your SIM Manager. You can usually find this via Settings > Connections > SIM Manager > Add eSIM.

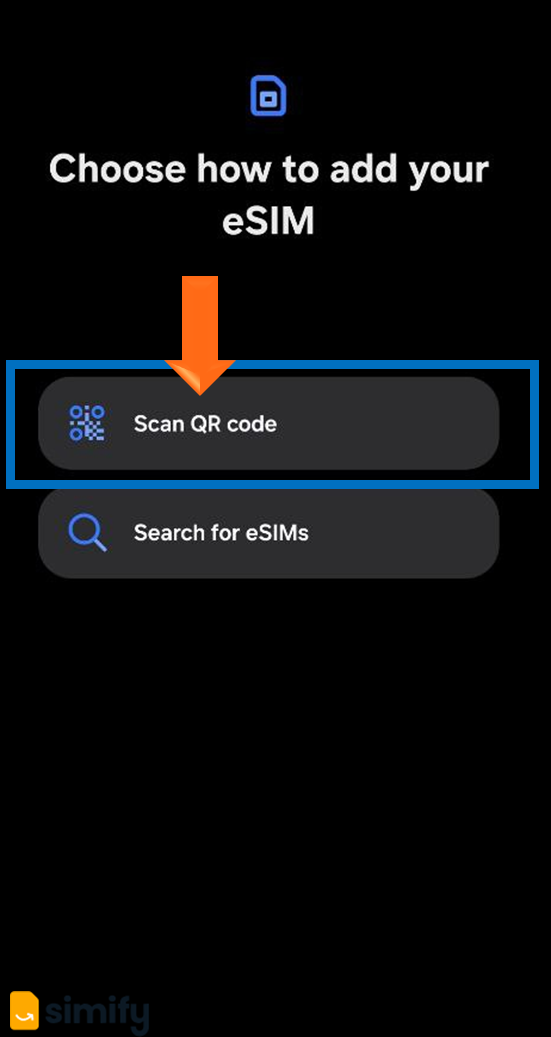
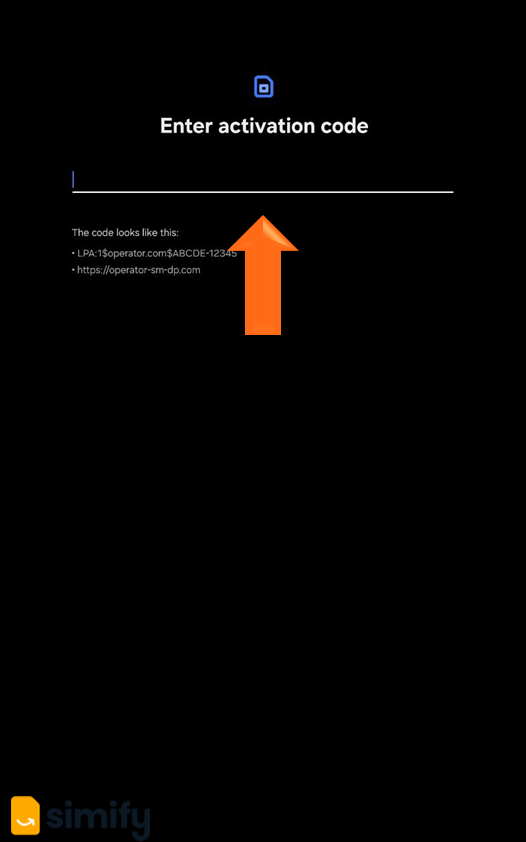
2. Tap on "Scan QR Code", then look for an option to "Enter Details Manually," "Enter Activation Code", or similar wording.
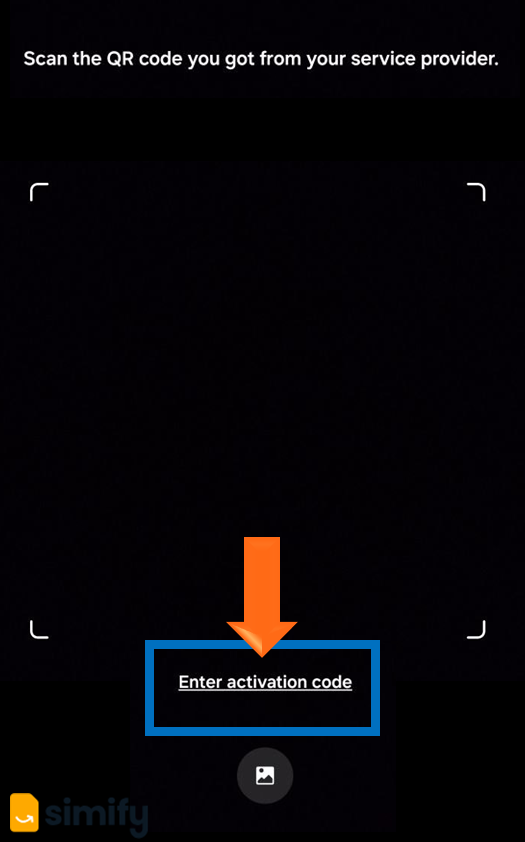
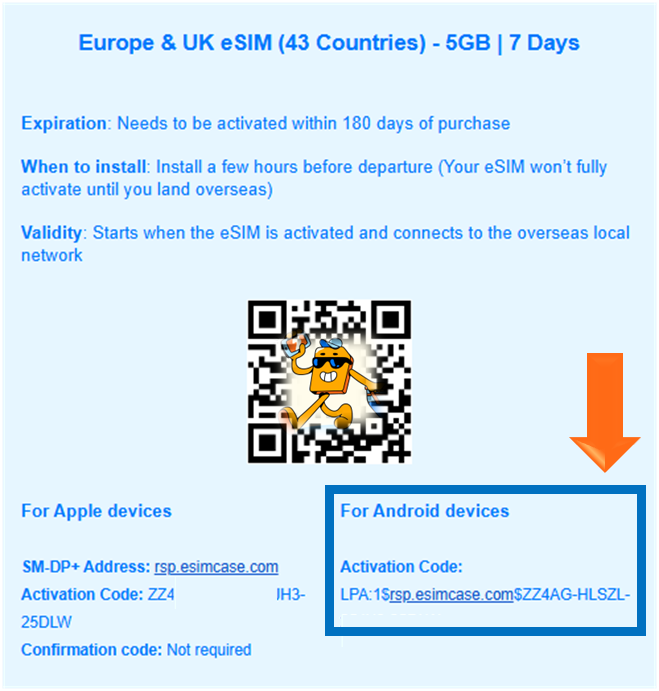
3. Input your eSIM's Activation Code. You can find this information in the email we send you under "Activation Code" for Android devices, or in your app as "LPA String".

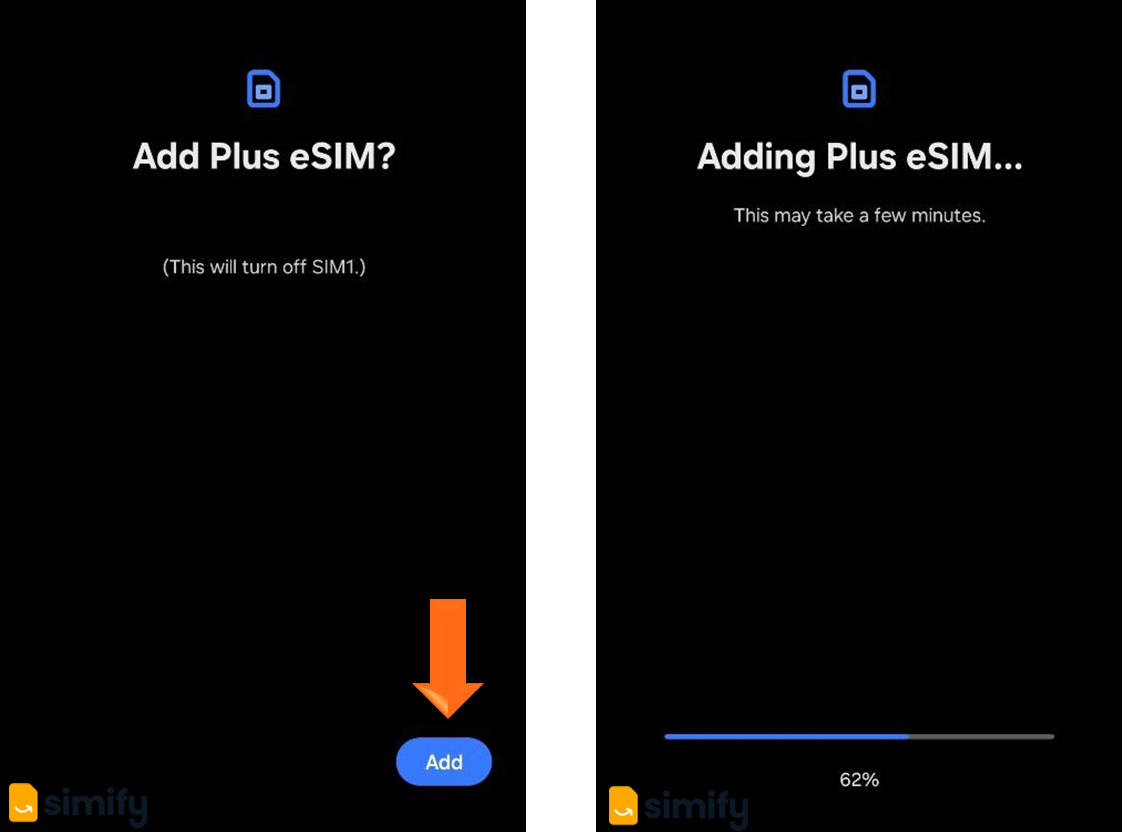
4. Follow your on-screen prompts and let your phone's system guide you through the remaining steps to install the eSIM.
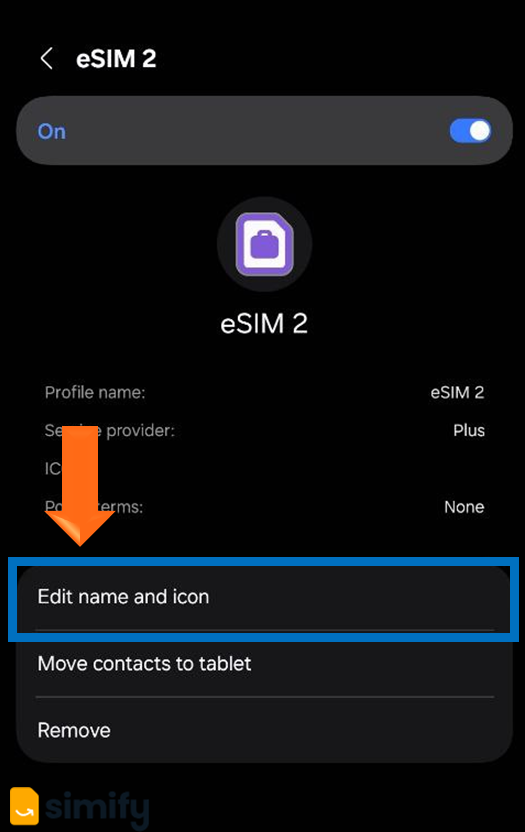
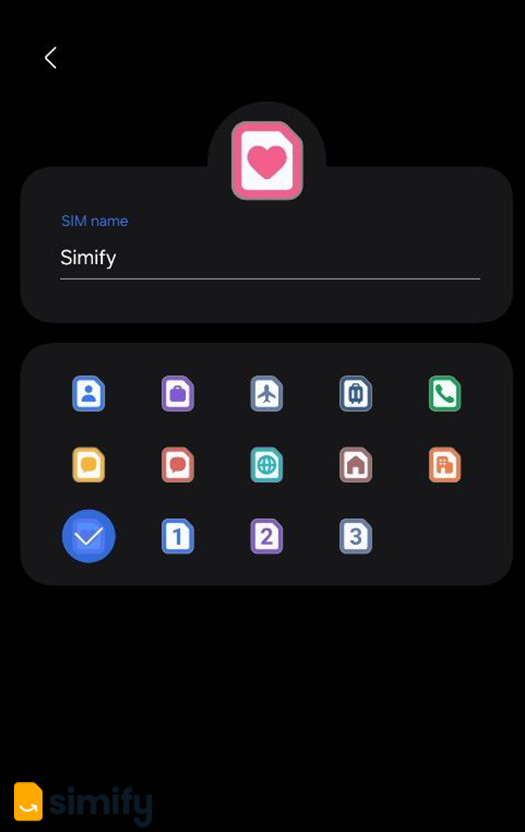
5. Rename your eSIM. You can do this by heading back to your SIM Manager, and tapping on your new eSIM, then selecting "Edit name and icon".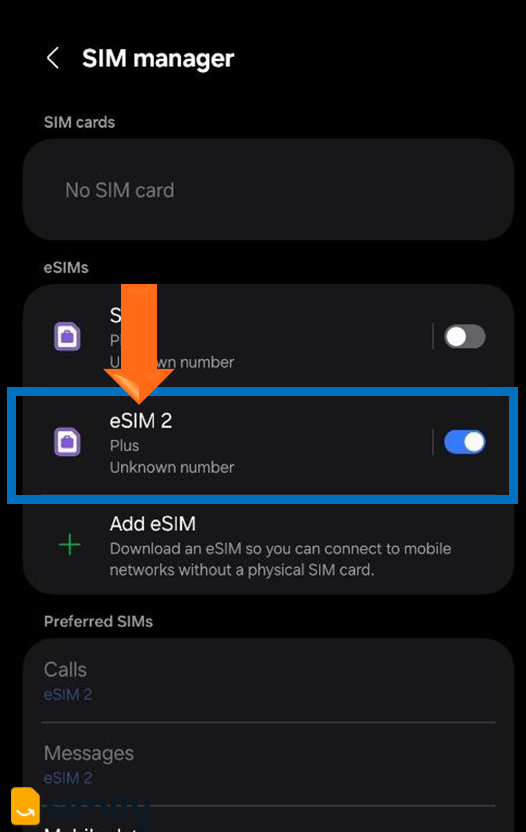
If you haven't flown out yet, make sure your ‘Simify’ line is turned OFF and Data Roaming is also OFF. This will allow you to use your phone the way you normally would.
And that's it - you're done! ✅ Your eSIM will be ready to connect once you land at your destination and adjust your settings
⚠️ If you install your eSIM before traveling, it may briefly show “Activating” and then give an error message. Don’t worry -this is expected. Simply switch it off and wait until you arrive at your destination.