How do I set up my eSIM on an Android device?Updated 6 days ago
Important: Do not delete your eSIM after installation. Once deleted, it cannot be rescanned or recovered.
What You’ll Need:
- An unlocked Android device that is eSIM compatible
- eSIM details and QR code sent to your email
- A stable internet connection
Table of Contents
QR Code Installation
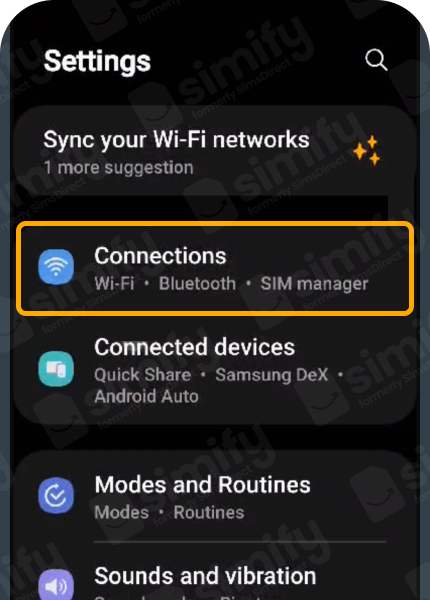
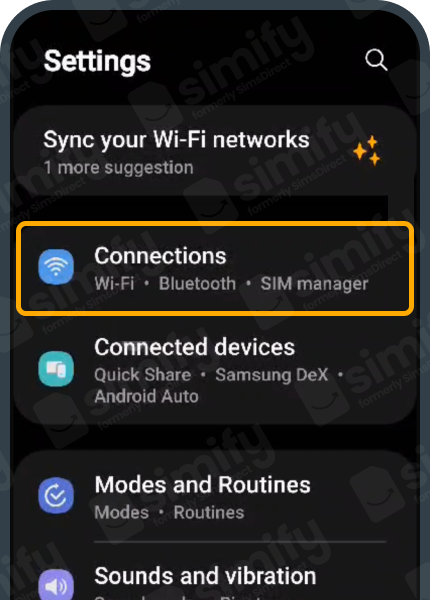
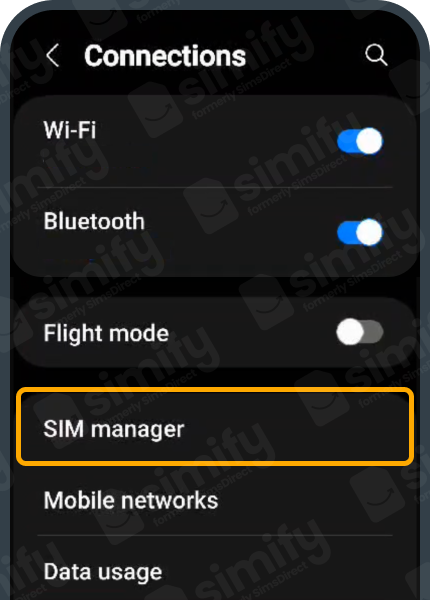
- Open the Settings app on your device. Select “Connections” or “Network & Internet.”
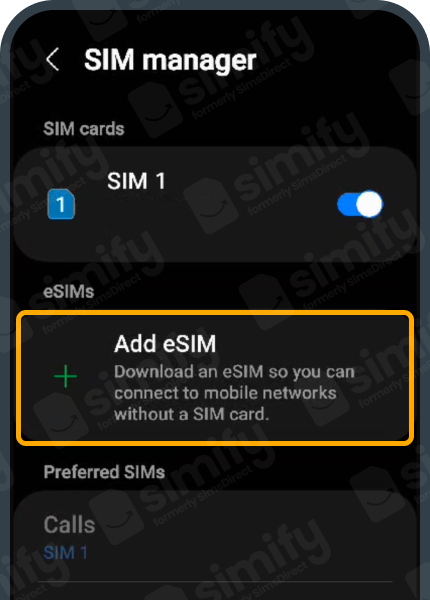
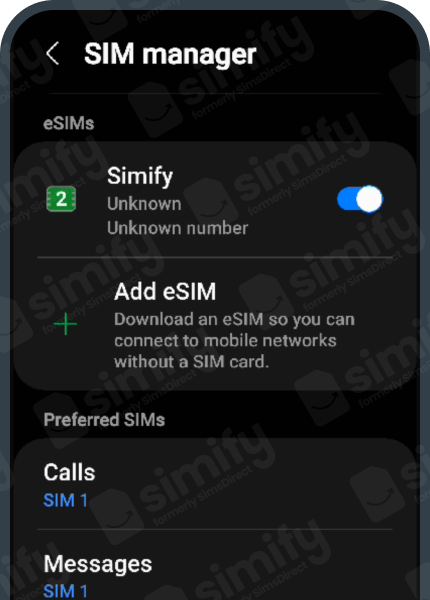
- Select “SIM manager.”

- Select “Add eSIM.”
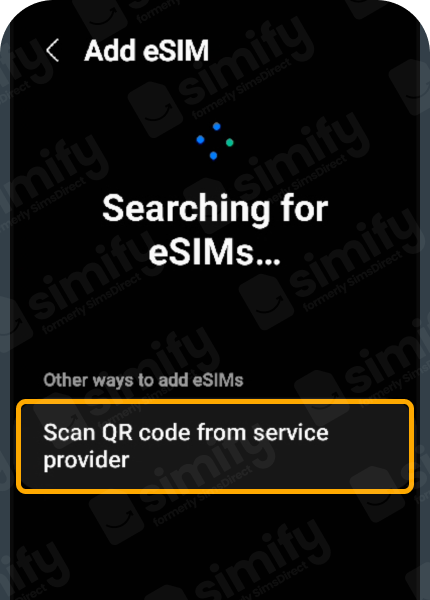
- Select “Scan QR code from service provider.”
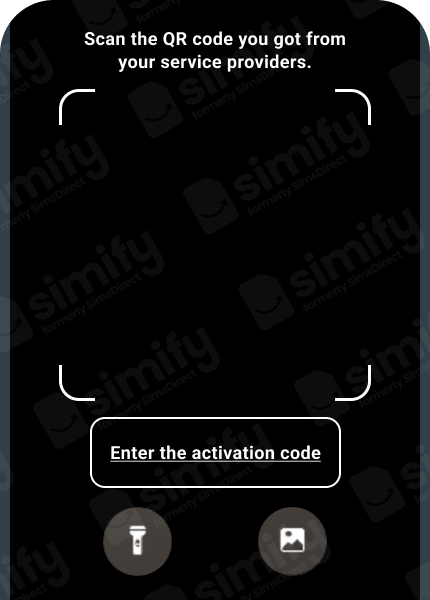
- Scan the QR Code.
- Option 1: Screenshot
- Take a screenshot of your QR Code from your eSIM email.
- Click the photo image and select the screenshot.
- Option 2: Scan
- Print out your email or have it open on another device.
- Scan the QR Code.
- Option 1: Screenshot
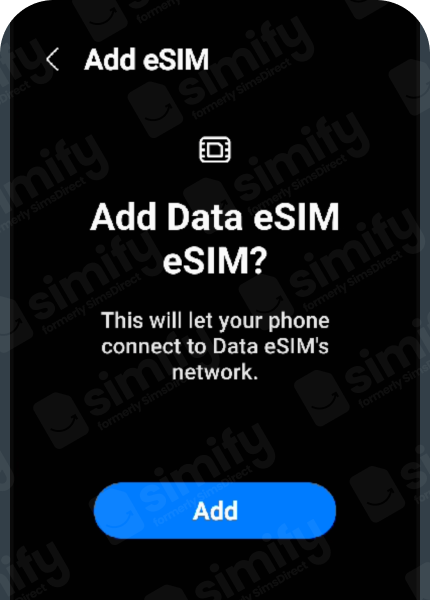
- Wait for the eSIM to load and tap “Add” to set up your eSIM.
- Select the eSIM.
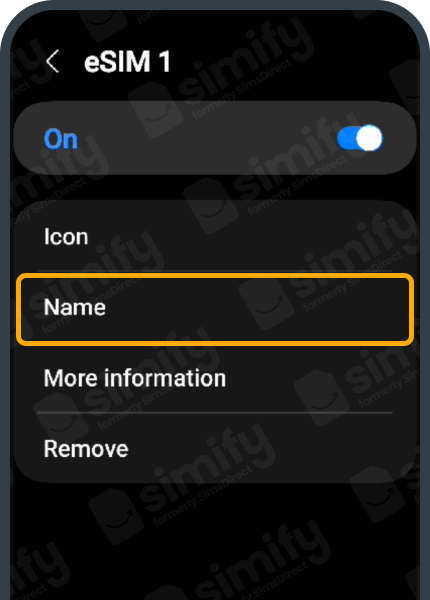
- Tap on “Name” and rename your eSIM to “Simify.”

- It should now look like this. You can choose to toggle it off until you’re ready to activate.
Activation
- Ensure you are in a country that the eSIM works in.
- Open the Settings app on your device. Select “Connections” or “Network & Internet.”
- Select “SIM manager.”
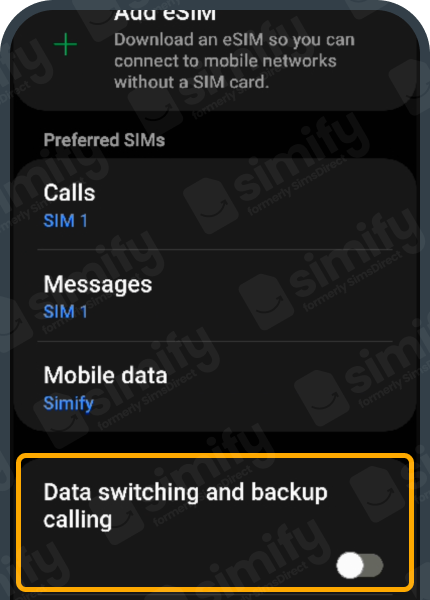
- Click on “Mobile data” and select “Simify” to use your new eSIM for data.

- Make sure you have “Data switching and backup calling” toggled off.
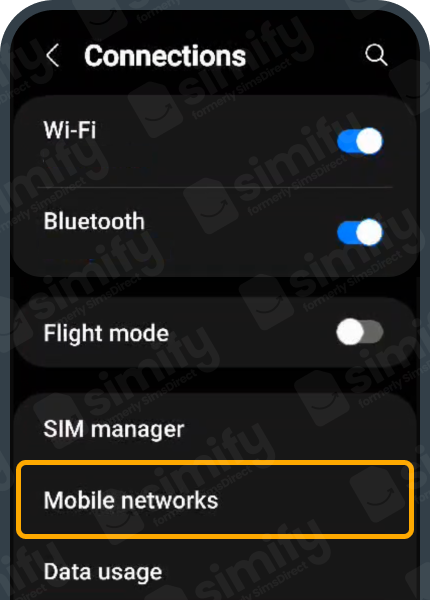
- Go back to “Connections” and select “Mobile networks.”
- Click on “Data roaming.”
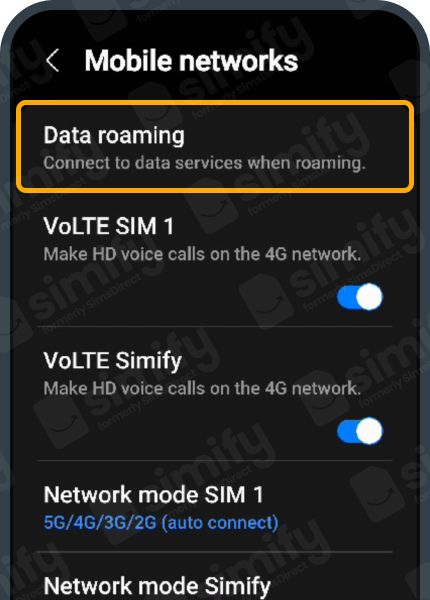
- Select “All networks.”
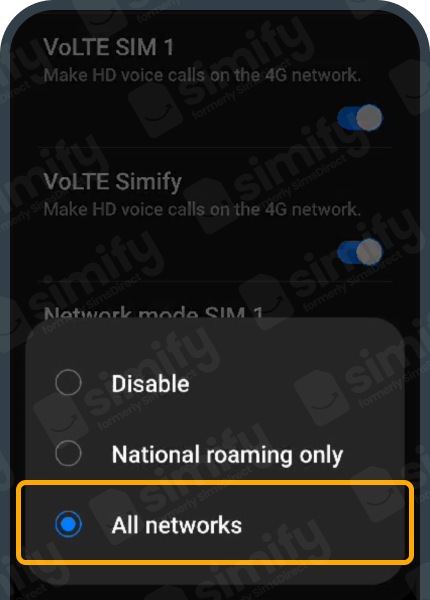
- Click “OK.”

- Restart your device to ensure it has activated properly!
If after 15 minutes, you are not connected to a local network and the internet is not working, refer to our troubleshooting guide.