How do I set up an eSIM on an iOS/Apple device? (IOS 17)Updated 2 months ago
Check out our step-by-step video tutorials on installing your eSIM below
How to manually install a Simify eSIM your Apple iPhone
How to install a Simify eSIM on your Apple iPhone using QR code
How to automatically install a Simify eSIM on your Apple iPhone
And then check out our video tutorial on activating your eSIM:
https://youtube.com/shorts/rUWxI29lEzQ?feature=share
Alternatively, keep reading to see the steps in our dedicated guide 📖 👇
If you have iOS 17.4 or above, you can install the eSIM by holding your finger on the QR code in your email until an option to “Add eSIM” appears.
What You’ll Need:
- An unlocked iOS device that is eSIM compatible
- eSIM details and QR code sent to your email
- A stable internet connection
Table of Contents
Installation Option 1 - Manual Installation
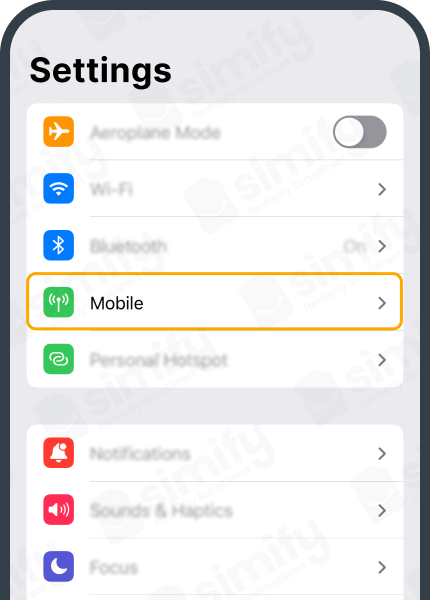
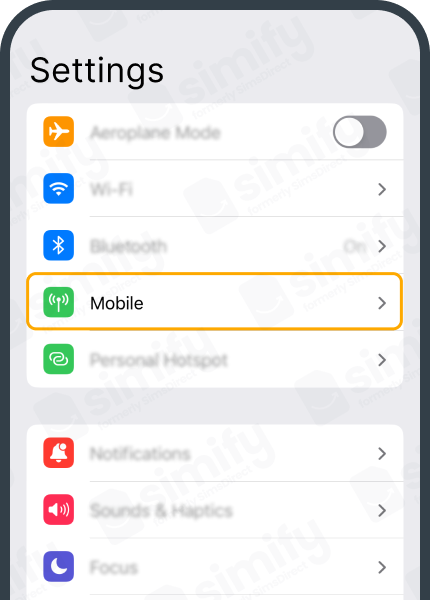
- Open the Settings app on your device. Select "Cellular" or "Mobile Data."

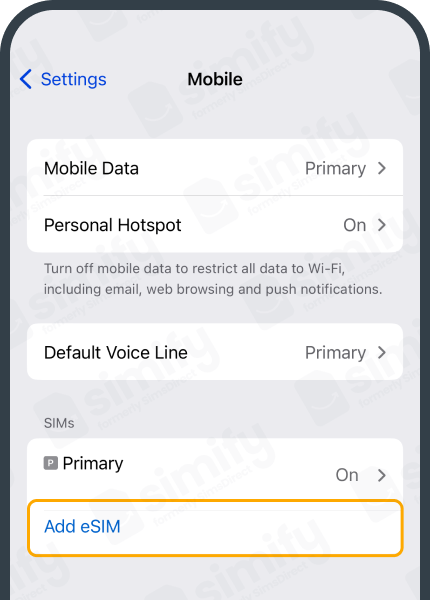
- Tap on "Add Cellular Plan" or "Add Data Plan" or "Add eSIM."
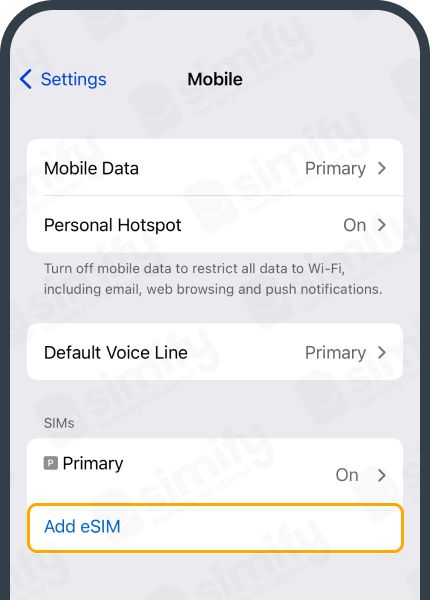
- Select “Use QR Code”

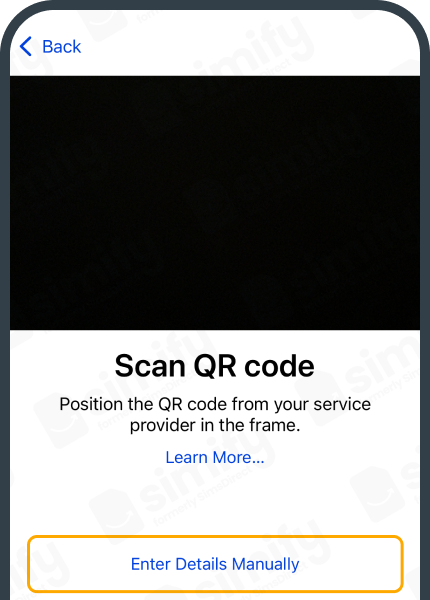
- Select “Enter Details Manually”
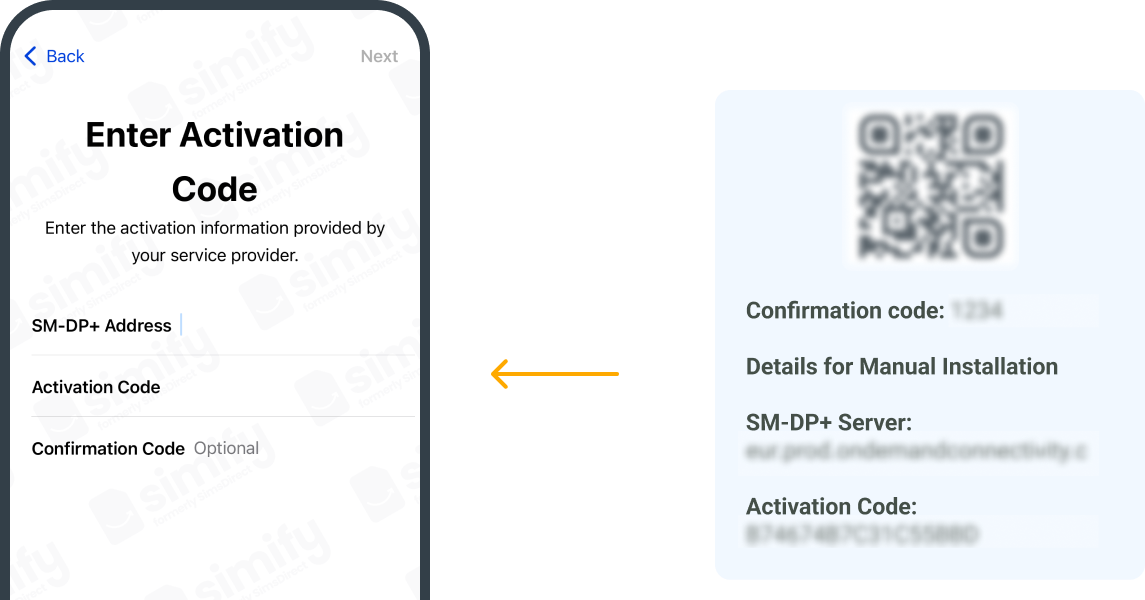
- Manually enter the ‘SM-DP+ Server’ and ‘Activation Code’ and Confirmation Code (if given, leave blank otherwise). Click ‘Next’ and continue setting up your eSIM.
- Select your new eSIM and rename it “Simify.”

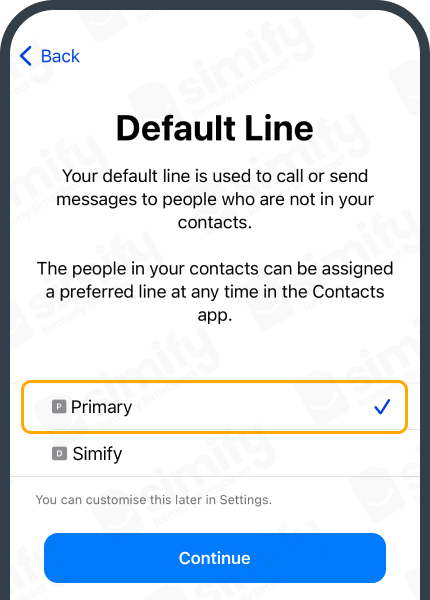
- Select Primary as your Default line and tap "Continue." Setting your “Default Line” as “Primary” will allow you to receive texts to your home number for free however answering calls and making calls/texts may incur roaming fees. Learn more

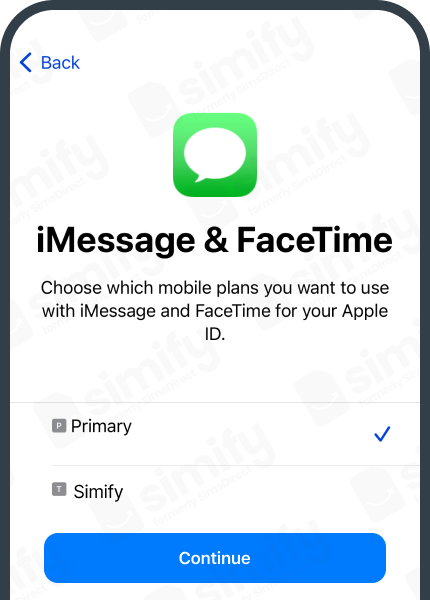
- Select Primary as your line for iMessage & FaceTime and tap "Continue."
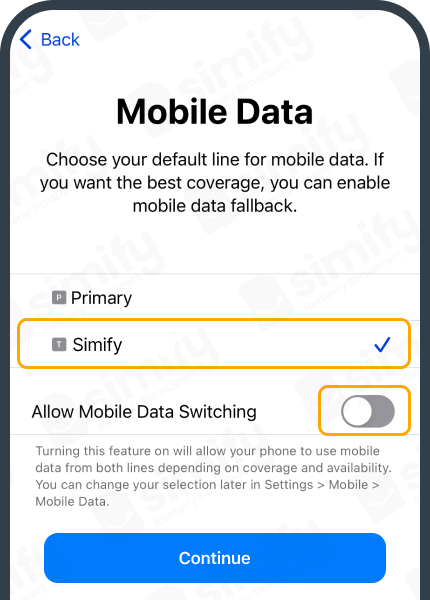
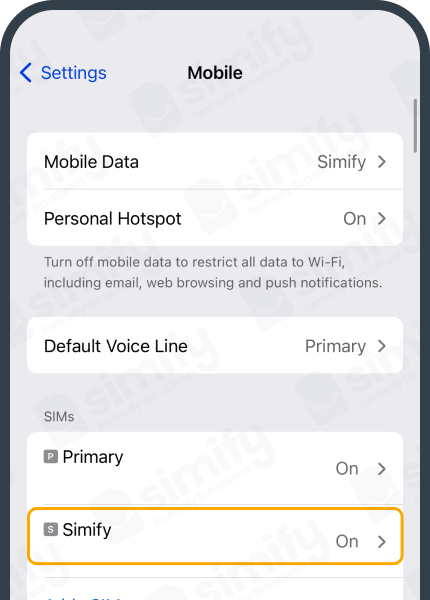
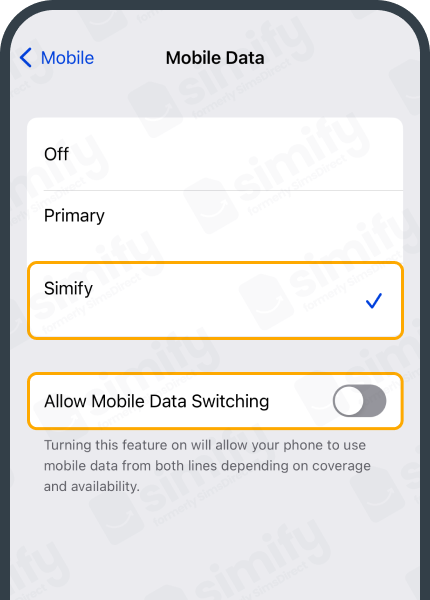
- Choose the “Simify” as your default for Cellular/Mobile Data. Ensure “Allow Mobile Data Switching” is turned OFF to prevent charges on your other line.
Installation Option 2 - QR Code Installation
- Open the Settings app on your device. Select "Cellular" or "Mobile Data."
- Tap on "Add Cellular Plan" or "Add Data Plan" or "Add eSIM."
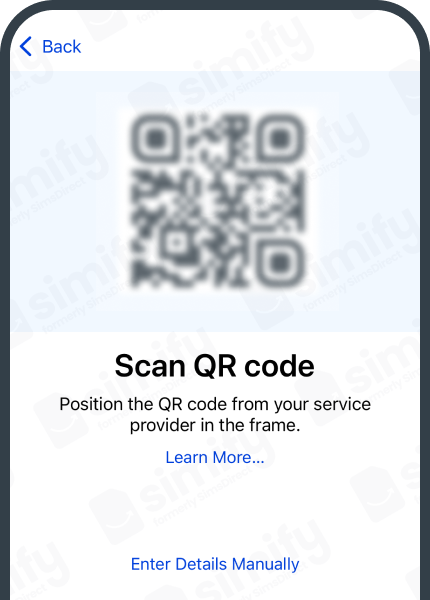
- Select “Use QR Code.”
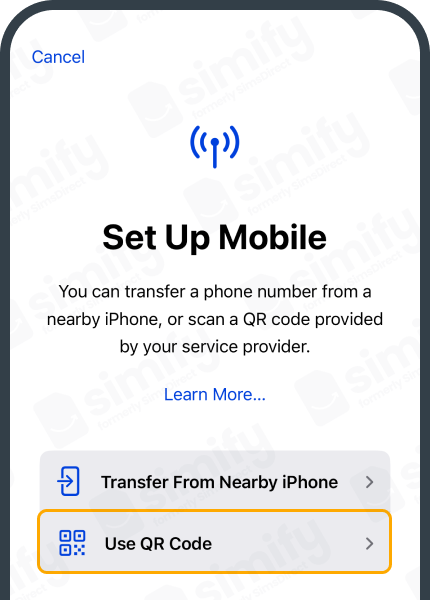
- Scan the QR Code from your eSIM email and continue.
- Select your new eSIM and rename it “Simify.”

- Select Primary as your Default line and tap “Continue.” Setting your “Default Line” as “Primary” will allow you to receive texts to your home number for free however answering calls and making calls/texts may incur roaming fees. Learn more
- Select “Primary” as your line for iMessage & FaceTime and tap “Continue.”

- Choose the “Simify” as your default for Cellular/Mobile Data.
Ensure “Allow Mobile Data Switching” is turned OFF to prevent charges on your other line.

- You have successfully installed your eSIM. You must now be overseas to activate and start using it.
⚠️ If you install your eSIM while still at home, it might try to activate automatically; but there's no need to worry! It will display an "activating" status for a short time, and then give an error message. All you need to do at this point is switch it off and wait till you arrive at your destination ✈️
Activating your eSIM
- Ensure you are physically in a country where the eSIM works.
- Open the Settings app on your device. Select "Cellular" or "Mobile Data."
- Select your “Simify” eSIM.
- Toggle on “Turn on this Line” if it’s not on and make sure “Data Roaming” is on.
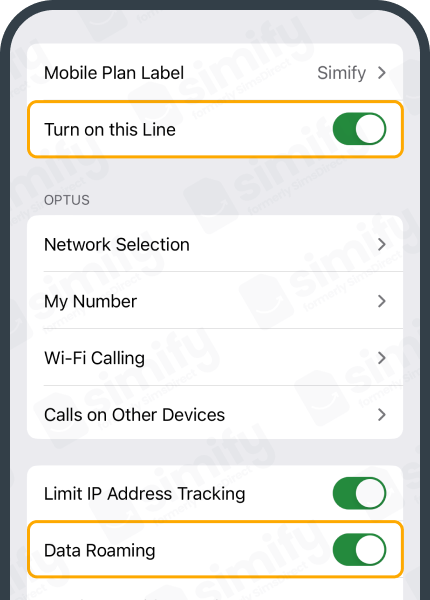
- Go “Mobile Data” and ensure “Simify” is selected and “Mobile Data Switching” is toggled off.
- Restart your device to ensure it has activated properly!
If after 15 minutes, you are not connected to a local network and the internet is not working, refer to our troubleshooting guide.